


Cannabis with the Quality Seal: Step-by-Step Guide
- A Brief Anatomy of Cannabis
- How to Choose Cannabis Seeds?
- Between Indica and Sativa
- Photoperiod Strains
- Autoflowering Strains
- Regular Strains
- Feminized Strains
- Medicinal Cannabis
- Germination and the Set of Necessary Tools
- Preliminary Preparation of Seeds and Germination
- Processing the aged seeds
- Germination
- Dropping the shell ("bucket head")
- What is the Right Way to Plant Cannabis?
- Stages
- Seedling. Nursery Transplant
- Vegetation
- Trainings
- Low-Stress Training (LST)
- High-Stress Training (HST)
- Defoliation
- Topping. FIMming
- Super Cropping
- ScrOG (Screen of Green), SoG (Sea of Green)
- Pre-flowering
- Flowering
- Harvest
- Indoor
- Pros and Cons
- What Are the Right Strains to Grow Indoors?
- Space. Growbox or Growtent?
- Hydroponic and Aeroponic Systems
- Choosing the Right Container
- Soil or Inert Substrate?
- Preparing the Perfect Soil Mix at Home
- Required Equipment
- Lighting
- Choosing a Worklight
- Fluorescent lamps
- Sodium discharge lamps
- Light-emitting diode lamps (LED)
- How to Calculate the Capacity of a Worklight?
- Light Spectrum and Color Temperature
- The blue spectrum (400-500 nm)
- The red spectrum (610-720 nm)
- Ultra-violet emission
- What is the Distance to Install a Worklight?
- Lighting Regime
- Optimal Microclimate
- Temperature
- Relative Humidity (RH)
- Ventilation
- Standard Configuration of the Ventilation System
- Optional Equipment for the Ventilation System
- How to calculate the required ventilation performance?
- Odor Control
- Outdoor
- The pros and cons of the great outdoors
- What Are the Right Strains to Grow Outdoors?
- Prime time for planting seedlings
- How to choose a grow spot?
- How to prepare a seedbed?
- Maintenance and Care Peculiarities
- Guerrilla Growing
- The perfect place for a guerrilla growing
- Safety precautions
- Feeding
- Essential Nutrients and Their Contribution to Cannabis Development
- Organic and Mineral Fertilizers
- Organic Growing
- Advantages of organic growing
- Ways of implementing organic cultivation
- Nutrient Application Schedule
- How to apply fertilizers?
- Boosters
- Watering
- Watering Schedule
- How to water cannabis?
- Control of pH and ppm
- The pH level
- The ppm (EC) level
- Pests and Diseases
- Pests
- Combating Methods
- Common Pests
- Cannabis Diseases
- Combating Methods
- Common Diseases
- Viruses
- Integrated Pest Management (IPM)
- Flushing
- Drying
- Curing
- Storage
- Storage of Seeds
Introduction
Long before the advent of history and biology as academic disciplines, people discovered the extraordinary plant, ushering in an entire era of human interaction with cannabis. In ancient times, the application of its properties was the prerogative of shamans and oracles, who used dried cannabis flowers for ritual purposes. However, with the passage of time, it became clear that, in addition to its mystical nature, cannabis has huge therapeutic potential.
Since then, the culture of cannabis cultivation and consumption has undergone multiple transformations, experiencing both prosperity due to technological breakthroughs and scientific research, and decline as a result of government "programs" aimed at prosecuting cannabis, its unwarranted stigmatization, and sophisticated manipulation of the collective consciousness. Today, the pendulum of history has swung toward common sense, and a wealth of theoretical knowledge and accumulated practical experience have made growing cannabis available to anyone committed to achieving results – a harvest of dense and fragrant buds grown by hand. Besides this, it should be understood that this hobby, in addition to the allure of the plant and the excitement of the growing process, involves considerable pitfalls that are crucial to familiarize yourself with before germinating and planting a young sprout at home or in an outdoor grow spot.
Whether you're a beginner, an advanced grower, or an expert with more than one successful season and even a breeding operation, you'll learn a lot from our guide. In common language and straightforward terms, this guide explains the fundamental principles and best practices for growing cannabis from seedling to harvest. Let's put it this way: we have taken a step forward, looking back and taking into account the traditions of ancient cultures and fusing them tightly with modern trends, technological developments, practical resources, and hands-on experience. Armed with knowledge and a determination to get things done, you will set out on a new trail of adventures and discoveries, promising generous rewards proportional to the efforts involved. May your grow be easy, your plants healthy and strong, and the quality of your harvest beat the Dutch!
Respectfully, The experts of the KADAMA seed shop.
A Brief Anatomy of Cannabis
You're holding more than just a tiny cannabis seed. It treasures the history of tens of thousands of years, the rich heritage of cultures and traditions of numerous ethnic groups that lived and still live on most of the continents of our planet, the limitless potential of genetic information, inexhaustible natural resources, the experience of cut-and-try, hit-and-miss, and the joy of smashing success. It is amazing how a drop of water can easily open the door to the fascinating world of a plant with magical properties and an enchanting charisma. Well, let's delve into the cannabis universe, starting with the trivial but responsible process of selecting a strain's seed and its germination.
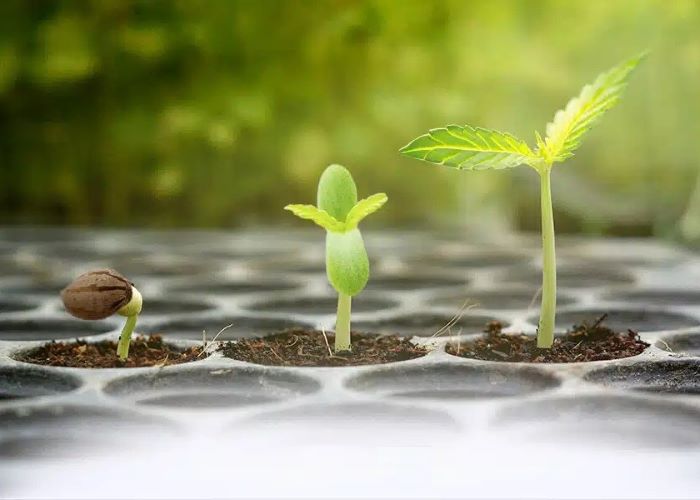
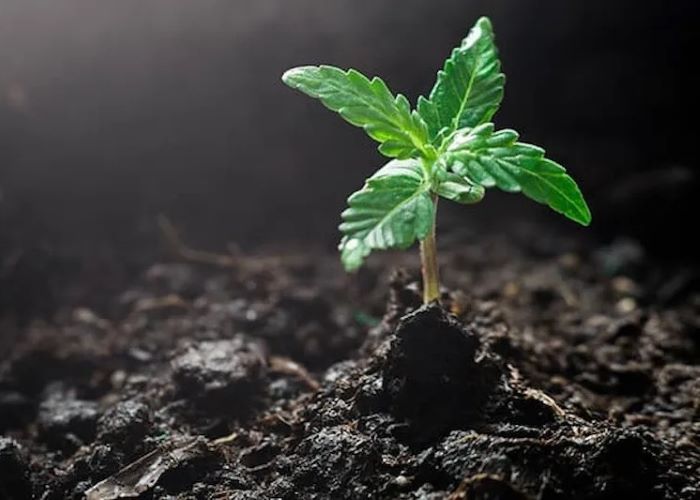
When a seed germinates, a rootlet appears. It lays the foundation for the feeding mechanism of the future plant. When planted in a growing medium, a rootlet will later develop into an extensive root system that will act like a sponge, absorbing water, oxygen, and the elements the plant needs from the substrate or nutrient solution. The immutable axiom of growing: healthy roots = healthy plant = bountiful harvest.
Simultaneously with the root system, the above-ground part of the plant begins to develop. The appearance of the first paired leaves (cotyledons) is a distinctive signal that the germination and attachment of the stem of the rootlet to the soil have been successful. Then a stem, flanked by lateral branches, begins to form. Their number and structure will depend on the varietal characteristics of genetics and trainings that the grower has applied during the vegetative stage.
The point where the branch meets the stem is called a node, and the distance between the nodes is called an internode. The wider the internodes, the more open the plant's structure is, and the more air can circulate freely within it. This has a positive effect on the plant's resistance to high humidity and the development of fungal diseases. Excessively wide internodes make the plants elongated, unstable, and fragile.
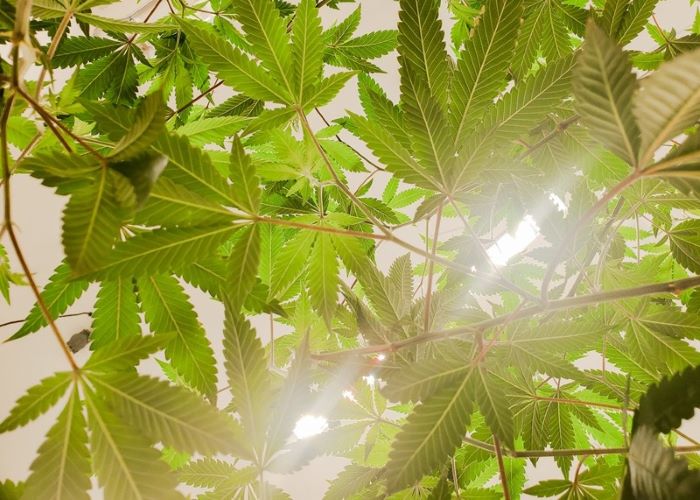
As the plants mature, the branches develop large, often seven-fingered leaves – the hallmark of cannabis. They perform like solar panels, capturing light and converting it into vital energy through the process of photosynthesis. Please note that excessive trimming of large leaves can kill the plant!
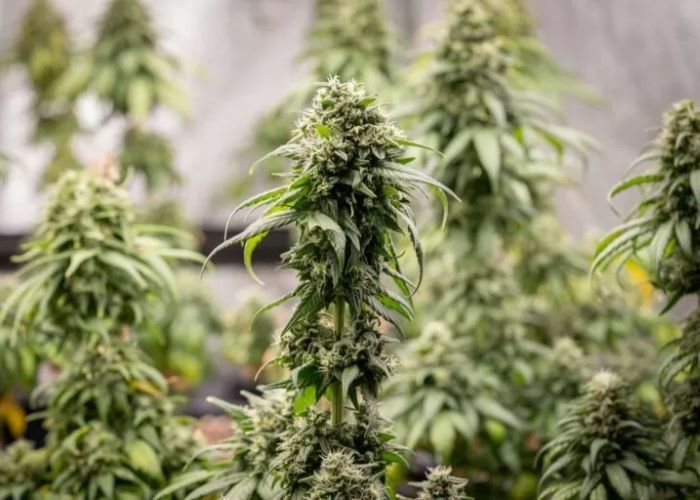
The plant shows signs of sex during the first 4-6 weeks of vegetation, which determines its further development and fate. Everything is easy with feminized seeds – just continue your grow as planned. However, if you grow regular strains, you will face the challenge of identifying the sex of plants to separate males from females to avoid pollinating the latter. You want a plant with unpollinated, large, and resinous buds (sensimilla, materka), not seeds from it, right? Be sure to carefully inspect the nodes extending from the main stem. This is where the cannabis reproductive organs, or bracts, are located. The male bracts look like a small ball from which the pollen sacs develop, which are similar to a bunch of bananas. The female bracts (calyxes) are drop-shaped and covered with whitish hairs (stigmas) used to collect male pollen. As the buds ripen, the stigmas dry up and change color to orange, copper, or brown, which is normal and signals that harvest time is approaching. The calyxes will later develop into flowers (buds), which are the primary goal of most growers. The buds are highly valued for their potential to produce trichomes, mushroom-shaped glands containing resin, which contain high concentrations of cannabinoids and terpenes. Accordingly, they are characterized by high potency and a unique aroma.
The flowers are surrounded by large fan and small sugar leaves. The latter are often covered with a layer of resinous trichomes. After drying, they are trimmed and can be used as raw material for extracts or (after decarboxylation) for cooking edibles.
Colas are clusters of flowers found at the top of the main stem and large lateral branches of a mature female cannabis plant. Colas consist of tightly knotted bracts of elongated sativa or pyramidal indica buds. They are valued by both growers and consumers for their high concentration of active resin, as well as their visual appeal due to their size and luster. It is possible to increase the number and size of colas, and thus improve yields, by conducting training sessions.
How to Choose Cannabis Seeds?
Today, there are more than 900 unique cannabis strains and about 50 landraces – authentic varieties grown over time in a specific geographic location that serve as the genetic basis for all hybrids. However, all this diversity has common progenitors: Cannabis sativa, Cannabis indica, and Cannabis ruderalis. They differ fundamentally in their individual features and characteristics, immunity, resistance to external influences, adaptability, set of genetic components, effects produced, requirements for the growing medium, and flowering periods.
Between Indica and Sativa
It is believed that sativa originated in Central Asia, however, over the pace of time it spread to other continents as well. Today, it can be found in Asia and the Mediterranean countries, South America, Africa, Central and Eastern Europe. Sativa strains produce plants with an extended and flexible structure (similar to a Christmas tree) with elongated leaves and wide internodes, yielding large, long, and airy flowers. Sativa is relatively whimsical in cultivation, requiring stable conditions, characterized by long flowering periods and, consequently, ripening. However, it confidently resists the onslaught of insect attacks and the impact of high humidity. The effects of sativa are commonly described as cerebral stimulation, a burst of energy, creative inspiration, and sociability. However, when consumed irresponsibly by inexperienced users, it can trigger panic attacks, anxiety, and even paranoia.
Indica is traditionally native to the mountain foothills and valleys of Afghanistan and Pakistan, Tibet, northern India, Africa, and countries in Central Asia. These areas are often characterized by arid climates or extreme swings in daytime and nighttime temperatures. Indica plants are compact in stature, bushy in structure, and have a branching pattern with short internodes, broad leaves, and resinous pyramid-shaped flowers. Due to its dense composition, indica is more vulnerable to mold, but it ripens much earlier than sativa. The effects of indica are typically expressed in their relaxing nature, physical and mental sedation, pain-relieving, and sleep-inducing properties.
The habitat of ruderalis is Eastern Europe, Russia, and the steppe regions of Asia. The climatic conditions of these regions, characterized by short and relatively cool summers, predestined the unique properties of ruderalis, reflected in its ability to flower automatically regardless of the length of daylight hours. This feature distinguishes ruderalis from indica and sativa strains, as they require a certain amount of light and darkness to enter the flowering stage. Breeders have embraced these distinctive traits and bred countless autoflowering hybrids with a compact, low-profile structure, making them a perfect choice for growing in confined indoor spaces or for those growers who value safety and discretion in an open-air outdoor environment.
Photoperiod Strains
Photoperiod is the ratio of light to darkness in the diurnal cycle that affects various processes in living organisms. Cannabis strains that depend on this process are called photoperiodic. When grown outdoors under natural light conditions, the flowering stage is triggered by a change in the length of daylight hours, when day and night divide the daytime in half. Indoors, this process requires switching the lighting regime to 12/12.
Major advantages of photoperiod strains:
- increased resistance to the development of pathogens and insect infestations,
- stress resistance and adaptability,
- height manageability due to the controlled length of the growing season when the plant is cultivated indoors,
- the amenability of plants to the majority of trainings and manipulations,
- high outdoor yields, occasionally reaching 2-3 kilos of flowers from a single plant.
In general, the effects delivered by flowers produced by photoperiodic strains are more potent compared to autoflowers due to the higher concentration of cannabinoids. However, through breeding experiments, autoflowering strains were developed that became as potent as photoperiod ones.
Along with the above-mentioned benefits, there are disadvantages as well. For instance, the cultivation of photoperiodic strains in regions with short summers is challenging because the season suitable for growing weed is limited to 3-4 months. Due to the impressive size of the bushes, indoor growing will require a fairly spacious growbox or advanced mastery of training skills. All in all, growing photoperiodic varieties is an art for botanists who have at least a basic level of cultivation and are willing to devote up to 4-5 months to the entire process. We want to comfort the newbies. Thus, empowered with theoretical knowledge, practical information gained from successful grow reports, as well as advice and recommendations from experienced colleagues, you will be able to cope with the challenges of cultivating photoperiodic varieties. In fact, the most important things in growing are determination, motivation, and a passionate desire to achieve the ultimate outcome.
Autoflowering Strains

The antipodes of photoperiod strains are autoflowering varieties, or, as they are commonly called, autoflowers. One of the main components of autoflowers is Cannabis ruderalis, which has already been mentioned above. Cannabis ruderalis was first described as a separate taxonomic unit about a hundred years ago, but it was not until the end of the twentieth century that it attracted the focused attention of breeders. Wild-growing ruderalis barely reaches 90 cm in height and has virtually no psychoactive potential, but while growing in a climate that can hardly be called "optimal", plants of this subspecies have developed a unique property: to flower regardless of the length of daylight hours, focusing solely on their age. This super ability was immediately embraced by the leading experts of the time, so the autoflowering function was introduced into the gene pool of cannabis breeding to shorten the vegetative phase, automatically transition to the flowering stage, and provide the plant with immunity to fluctuations in external conditions.
Hybrids containing ruderalis in their genetic composition start flowering independently (automatically) within 2-4 weeks after seed germination and reach harvest maturity in 6-10 weeks, thus fitting the entire life cycle into a short period of 2-3 months. They do not require meticulous pruning and shaping, are quite compact, have a moderate "appetite" and, coupled with the intensity of the ripening, are an ideal option for the first steps in growing cannabis.
However, autoflowers are vulnerable to transplanting and most training techniques due to the limited time available to recover from the resulting stress. Plants with an average height of 50 to 120 cm have a moderate yield proportional to their size, so when choosing autoflowering strains, by default, you bet not on quantity but on rate. This option often makes sense if you live in a cool region with an unstable climate, short summers, or do not have much indoor space. Microgrow enthusiasts successfully grow autoflowers in computer towers, compact nightstands, sections of wardrobes, kitchen furniture, and even suitcases...
Regular Strains

Cannabis is a dicotyledonous plant with male pods and female flowers in separate species. "Girls" produce flowers that are high in resin, cannabinoids, and terpenes content. "Boys" are a source of pollen. They are used by breeders and enthusiasts to pollinate female plants to produce seeds and develop new hybrids.
When growing regular (common) strains, the sex distribution is usually close to 50/50 split. Cannabis shows its sex at the pre-flowering stage. Male plants are usually discarded or, if needed, grown separately from female plants to prevent pollination. If you place diclinous plants "under one roof", the slightest movement of the plant or a current of air will be enough to find pollinated flowers filled with seeds instead of potent buds. In this case, there is no sense in expecting the declared qualities of the strain since the female plant will devote all its energies to reproduction.
Feminized Strains
Due to the feminization technique invented by the seed bank of Dutch Passion in the early 2000s, the issue of sexual uncertainty inherent in regular cannabis strains has finally been addressed. Breeders, by applying the stressful conditions of the inverse transformation method to female plants, achieve circumstances in which they begin to produce pollen. The pollen collected is used to pollinate female plants, resulting in feminized cannabis seeds that produce female plants in 90% of cases. This revolutionary discovery completely redefined the growing operation, shifting growers' focus from monitoring plant sex characteristics to the entire process.
Feminized plants have more durable immunity and higher yields compared to regular plants. While it is not possible to obtain feminized seeds from a preferred strain for subsequent cultivation, you can always cut clones to get female plants.
Medicinal Cannabis
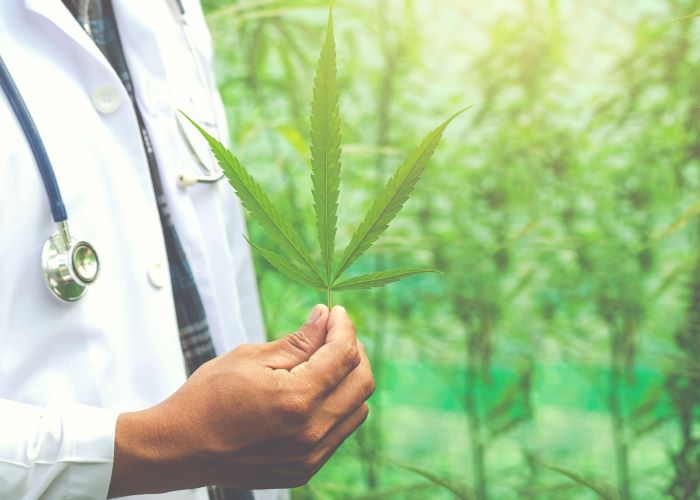
In general, the term "medical cannabis" is traditionally associated with strains that contain high levels of cannabidiol (CBD). CBD is a cannabinoid that, due to its unique chemical composition, has a wide range of applications, from the treatment of chronic pain and inflammation to its use in the complementary therapy of severe forms of epilepsy, neurodegenerative and autoimmune diseases.
With the wave-like movement of cannabis legalization in a number of countries and increased interest from the scientific community, new aspects of the therapeutic use of cannabis have been discovered. The medicinal properties of terpenes, natural phytoaromatic compounds responsible for the flavor and aroma of cannabis, have been recognized as a source of therapeutic potential when combined with cannabinoids. Moreover, the scientists have identified other cannabinoids, e.g., cannabichromene (CBC) and cannabigerol (CBG), which have pronounced pharmacological properties. Observations and extensive research revealed the concept of the "entourage effect" – a synergetic, complex interaction of cannabinoids and terpenes on the human endocannabinoid system, resulting in mutual enhancement of each other's therapeutic properties.
Today, it is widely recognized that any variety of cannabis (even recreational) is believed to have therapeutic benefits. Sativa stimulates mental activity and helps combat fatigue, stress, and depression. Indica, for its part, addresses pain and inflammation, loss of appetite, and sleep disorders. However, cannabis should not be considered a panacea, especially for serious diseases that require a holistic approach to treatment. If you decide to include cannabis in your medicine chest, we recommend a thorough and detailed study of the therapy, considering the hundreds of studies and the latest findings reported by countries that have legalized cannabis.
Germination and the Set of Necessary Tools
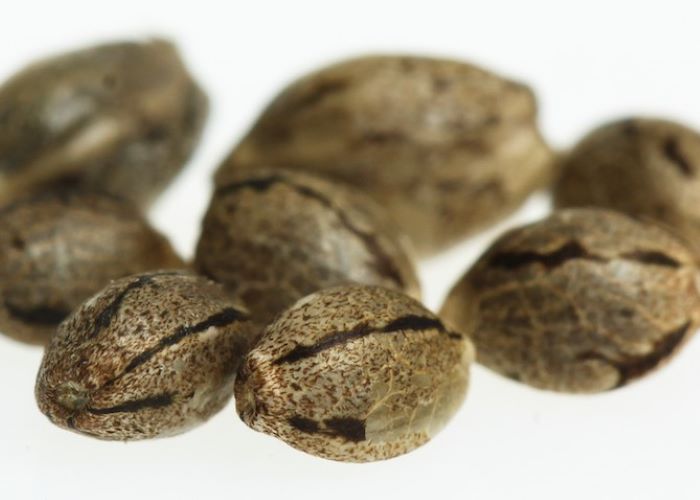
A key factor that determines the health of the future plant is proper germination. Even minor damage to a seed at this stage can, at the very least, reduce the future crop by half and, at worst, prevent the seed from germinating at all. So, arm yourself with patience and proceed with a sense of overall responsibility!
To ensure that seed germination runs smoothly, there are a few factors to consider, guaranteeing the success of the entire process:
- germinate the seeds in a tightly closed container kept in a dark place,
- maintain a stable air temperature within the range of 23-29 ℃ and relative humidity between 70-80%,
- the germination environment should always be moist (but not soggy!),
- protect germinating seeds and seedlings from cold and draughts,
- limit your manipulations to the most essential ones and avoid excessive contact with seeds and seedlings,
- perform all actions gently and do not make sudden movements.
Observe sterility! This condition is mandatory, and there can be no derogation from this rule. Disinfect your tools and work surface every time (!) you come into contact with seeds. Often, growers ignore this aspect and pay a heavy price in damaged plant material.
Prepare the necessary tools you may need:
- gloves, rubbing alcohol, or antiseptic to ensure the sterility of the process,
- tweezers and toothpicks for manipulating the seeds,
- the glass container with clean and pH-stabilized water (pH 5.5-6.5) at room temperature (21-23 ℃),
- a sushi stick or pencil to make a hole in the substrate,
- a spray bottle for moistening the substrate,
- paper towels or sponges for the wet method of seed germination,
- rockwool cubes, Jiffy peat, or coco coir pellets,
- the plastic container or zip-lock bag to create an airtight environment,
- plastic cups for covering seedlings and creating a greenhouse effect,
- light-proof seedling pots or the same above-mentioned plastic cups,
- a substrate for growing seedlings.
Preliminary Preparation of Seeds and Germination
The first step to a coveted harvest is preparing seeds for germination. Soak them in clean, pH-ed water at room temperature and place the container in a warm, dark place for 12-24 hours. During this time, viable seeds will sink to the bottom, their shells will soften, and the water will penetrate deep, promoting the awakening of the processes of the beginning of new life. If some seeds are still floating, push them slightly toward the bottom. If this approach fails, don't be so quick to discard them. Just sprout them separately. Do not keep the seeds in water for more than 24 hours! After the time specified above, use tweezers to gently transfer the seed to a container for follow-up germination.
Processing the aged seeds
The germination rate of seeds decreases over time, their shells thicken, and it becomes more difficult for moisture to penetrate the embryo. For accelerating the germination of such seeds, the scarification method is used. Roll a small piece of fine grit sandpaper into a tube and place the seeds inside. Hold the edges of the formed cylinder with your index finger and thumb and shake vigorously for 45-60 seconds. The microscopic scratches (scars) make it easier for water to penetrate the seed embryo and start the germination process.
Germination
There are several classic ways to germinate cannabis seeds. The easiest and most popular one is the wet method using a paper towel. To do so, follow the steps outlined below:
- take a piece of paper towel, unfold it, and moisten it with warm water from a spray bottle. The paper towel should be moist, but not too wet,
- place the pre-soaked or dry seeds on the bottom half of the paper towel and cover with the other half, moistening lightly with water from a spray bottle,
- place the paper towel with the seeds in an airtight container (zip-lock) and store in a dark place at a temperature of 23-29 °C,
- check the seeds regularly, keeping the towel moist but not "drowning" in water, and occasionally wetting it with a sprayer,
- when the radicle’s length reaches 1-3 cm, use tweezers to gently place the germinated seed, radicle side down, into the growing medium.
Direct planting involves sowing seeds directly into the prepared substrate.
The sequence of steps:
- fill the prepared container with germination substrate,
- using a sushi stick or the sharp end of a pencil, make a small hole up to 5 mm deep in the center of the substrate,
- place the cannabis seed in the hole with the radicle side down and cover it with a light layer of substrate,
- moisten the substrate with water from a spray bottle. Cover the planting area with a plastic cup to create a greenhouse effect,
- place the container in a dark and warm place,
- check the container daily, occasionally wetting the substrate surface with pH-ed water from a spray bottle. If all the conditions are met, the sprout will appear in 5-7 days.
The main advantage of this method is the elimination of the slightest possibility of traumatizing the delicate root shoot (radicle) when transplanting to a permanent place of cultivation, which is especially important when you want to grow autoflowering strains.
Germination in rockwool cubes or Jiffy peat pellets is the perfect option for germinating seeds when firm seedlings are subsequently planted in a prepared seedbed outdoors or potted indoors. This method is also effective for stress-prone auto-flowering plants prior to transplanting to a permanent growing site. The general scheme resembles the direct planting method.
- soak the cubes or pellets for 24 hours in clean water with a pH in the range of 5.5 to 6.5,
- place the seed, pointy end down, in the prepared hole in the center of the cube or pellet,
- arrange cubes or pellets with seeds in a container with the bottom covered with any drainage component (water absorbing material, expanded clay, zeolite, pebbles) and cover with a lid or plastic wrap to create a greenhouse effect,
- place the container in a warm, dark place,
- ventilate the container on a regular basis and check the moisture content of the cubes or pellets. If no moisture is visible when lightly squeezed, spray the cubes or pellets with pH-ed water,
- once sprouts appear, remove the lid or plastic wrap,
- transplant the cube or pellet into a permanent growing medium after the first true leaves or rootlets have emerged and are pushing through the cube or pellet,
- place the cube or pellet in the prepared planting hole or pot and cover it with substrate.
Dropping the shell ("bucket head")
In most cases, the sprout manages to get rid of the seed shell on its own. This usually occurs within 5-7 days after germination. If the process of dropping the "bucket" is delayed, cannabis development is impaired, resulting in poor health and reduced yield. To help the plant break free from constraining circumstances, follow the steps outlined below:
First, gently "plant" a drop of water on the open shell using a dropper or wetting the tip of your finger. Wait 10-15 minutes. The moisture will soften the shell from the inside, and it will be easier to remove. Try to gently remove the "bucket" from the head of the sprout using a toothpick, needle eye, or tweezers. If the opened shell does not come off, repeat the wetting procedure. Don't be rude when trying to remove the shell. Such actions may cause injury to the sprout.
If the "bucket" remains on the sprout after these manipulations, take two toothpicks and, holding the stem, insert them between the halves of the shell above the cotyledons and slowly pull them apart, thus separating the shell into two parts. To avoid the risk of damaging the fragile stem, this step is best done in pairs, with one person removing the shell and the other holding the sprout.
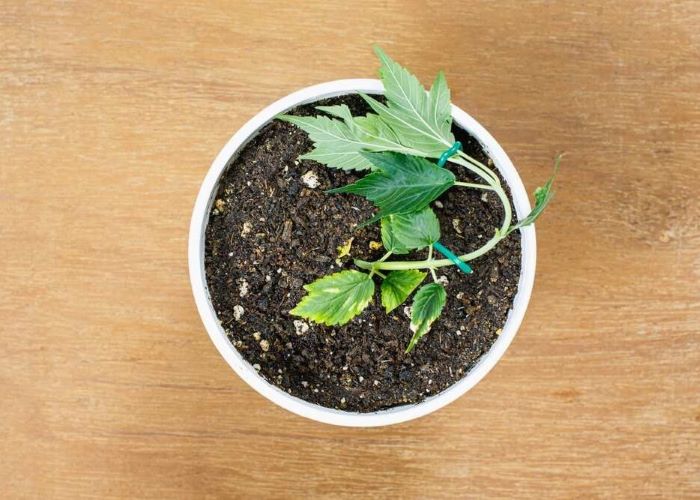
What is the Right Way to Plant Cannabis?
The germination process is followed by the planting of the seeds in a growing medium. To ensure proper rooting, it is important to choose the right container for the early stages of development and to perform the planting procedure following the recommendations given below. When picking a container, consider how often you plan to transplant the growing plants, because once the root system occupies the available amount of substrate, the above-ground part will slow down.
The seeds are commonly planted in:
Light-proof plastic cups or small garden pots with a capacity of up to 150 ml. Make sure they have drainage holes, as stagnant moisture is harmful to the health of young plants. We recommend using a separate container for each seed. This greatly simplifies the transplanting process and reduces the risk of injury to the root system during partitioning.
Seedling cassette trays with unit cells simplify the process of transferring firm seedlings to the next (intermediate) container. Seedling cassette trays have a limited capacity and cannot be considered a suitable container for a seedling, which must be transplanted after 7-10 days. Not suitable for autoflowers.
Rockwool cubes or Jiffy peat pellets have proven to be an excellent medium for germinating and growing seedlings for transplanting to the next container or permanent outdoor location. They are extremely effective in growing auto-flowering strains, where frequent transplanting puts the delicate and sensitive root system at risk of damage.
The substrate for growing seedlings should be airy, neutral (pH 6.0-6.5), and well-drained. A nutritious organic soil of suitable structure or an inert substrate (e.g., coco coir) is usually used as the base.
When planting seeds, fill the containers with the prepared substrate and make a hole in the center of the substrate to a depth equal to the root length plus 5 mm. Using tweezers, carefully plant the seed with the root downwards, cover with a thin layer of substrate, and moisten the surface with a sprayer, taking care not to overwater. If you plan to perform LST, make the hole in the middle of the distance between the edge of the pot and its center.
Stages
The seeds are planted, and now comes the most interesting part: watching the first sprouts grow into cannabis bushes bursting with energy and fragrant flowers. Before young, tender sprouts are ready to be harvested, they undergo a journey of varying environmental conditions, maintenance, and care demands. So let's take a look at each stage so you don't mess up.
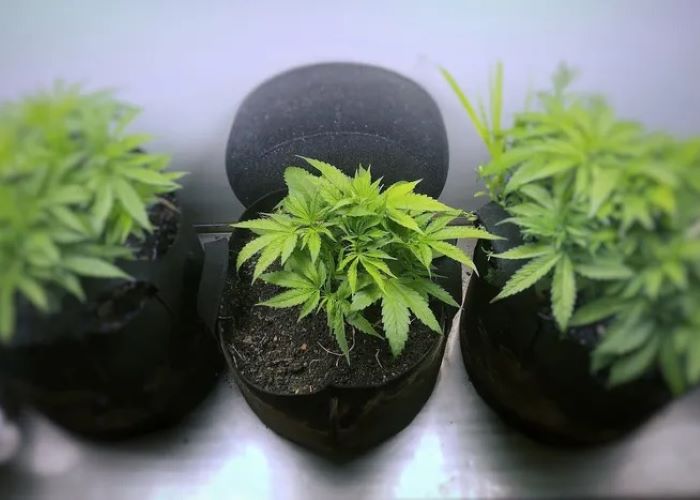
Seedling. Nursery Transplant
- Stage duration: 2-3 weeks
- Lighting regime: 20/4 or 18/6 indoors, 6-8 hours of direct sunlight outdoors
- Indoor microclimate parameters:
- Temperature: 23-28 ℃ during the day and 20-22 ℃ at night
- Relative humidity: 60-70%
As soon as the first paired leaves appear above the surface of the substrate, the cannabis will enter the seedling phase. The fundamental rule of this period is not to be overly concerned with care, as the growers say, not to fall head over heels in love with the plants, but to interact with them as needed. Avoid overwatering, as the root system is not yet strong enough to absorb large amounts of water. No fertilizers at this point! Periodically spray plants and soil surface with clean, pH-ed water. Keep your grow area clean at all times. To maintain high humidity, cover the seedlings with clear plastic cups and periodically lift them to expose the young plants to fresh air. At this stage, the plants do not need intensive lighting and are satisfied with a cold (blue) spectrum of light from a table lamp or a LED light with the same spectrum and reduced wattage, which in advanced panels is adjusted with a dimmer control.
With the appearance of true leaves, the seedling becomes a nursery transplant and remains in this status until it develops 3-4 true leaf floors. Now you can remove the cups that helped create the greenhouse effect. You can increase the watering slightly. Be careful, though, even a slight misstep at this stage can seriously affect further development. Closely monitor the appearance of the plant. The leaves should be of a juicy green color with no changes in the plate structure. Reduce watering and increase lighting slightly if they are droopy and thin. Perform the slow, circular watering a short distance from the stem, moving closer to the edge of the pot each time. This will encourage the roots to spread out in search of vital moisture. At this point, you can begin to gradually apply fertilizer at a concentration that is three-quarters less than the manufacturer's recommended dosage for this stage of the plant's development. You can occasionally turn on a fan to let the air currents gently sway the plant. This will strengthen the stem walls, making them denser and more stable.
Vegetation
- Stage duration: 3-15 weeks
- Lighting regime: 18/6 or 20/4 indoors, 8-12 hours of direct sunlight outdoors
- Indoor microclimate parameters:
- Temperature: 20-28 ℃ during the day and 20-22 ℃ at night
- Relative humidity: 50-60%
The rapid gain of green mass indicates the plant's entry into the vegetative stage. This is not only the longest but also the most exciting stage of cannabis development, where the quantity and quality of your future crop are established. Transplant a matured nursling to a larger container or permanent outdoor location to give the roots more space to develop. As the plant grows, it will need more frequent and slow watering. Each time, stop watering farther away from the stem. Don't forget to encourage the roots to seek out moisture, thus promoting increased branching of the root system.
Trainings
During the vegetative stage, trainings are conducted to properly shape the vegetative mass and optimize cannabis productivity, as well as facilitate light and air access to the lower floors and deep into the bush. Trainings are not universal and vary in their methods of intervention. Some growers prefer to let their plants develop naturally, especially when cultivating outdoors. For many dedicated cannabis growers, training is a must when it comes to maintaining stealth or optimizing space when it's limited.
Low-Stress Training (LST)
Photoperiod strains: +
Autoflowering strains: +
With the implementation of LST, the stems are delicately bent and/or stretched and fixed in position for a period of time to create a more uniform, compact, and low profile that allows for full distribution of light throughout the plant structure. Use soft twine, rubber bands, or garden wire to tie the branches. The training is carried out in the early vegetative stage, when the cannabis stem and branches are quite flexible and elastic.
High-Stress Training (HST)
The HST represents more radical techniques of cannabis training: massive pruning of leaves (defoliation) and even cutting off parts of the stem, allowing growers to create a plant of the desired shape and size, redistributing the flow of nutrients. All manipulations are performed with gloves and sharp, sterile tools. For 5-7 days after a training session, cannabis growth may slow down a bit or even stop, which is completely normal as the plant needs time to recover from the stress it has been exposed to. Therefore, these training techniques are not recommended for autoflowering strains, as well as for application by novice growers.
Defoliation
Photoperiod strains: +
Autoflowering strains: –
Defoliation is the partial removal of leaves, preventing adequate ventilation and/or light penetration deep into the plant. Moderate defoliation involves cutting no more than 25% of the large leaves. When growing autoflowering strains, consider cutting even smaller quantities. A distinction is also made between extreme defoliation, called "schwazzing", when all leaves above 2-3 floors are removed at the pre-flowering stage. This training is highly stressful, so we do not recommend it for autoflowers and inexperienced growers.
Topping. FIMming
Photoperiod strains: +
Autoflowering strains: –
The method involves cutting off the top part of the stem, which increases the number of lateral branches. Topping implies the removal of an upper part of the stem just above the node, thus triggering the growth of a greater number of axillary buds. When FIMming, about 75% of the upper part of the branch is cut off from a node with 3-5 branchlets without capturing their growing point, thereby increasing the number of active buds at that node. The first training session takes place in the 1st or 2nd week of active vegetation, when the plant reaches a height of 5-6 floors. On average, growers perform up to 3-4 pruning sessions during the vegetative stage to control plant elongation and increase the final yield.
Super Cropping
Photoperiod strains: +
Autoflowering strains: –
Super cropping is used in the late stage of vegetation (but not later than 7-10 days before the expected transition to flowering), when the stem is thickened, but the structure of the plant requires adjustment due to uneven development or excessive stretching of some branches. Super cropping involves softening the stem, which is then bent in any direction (excluding its break) without removing the vegetative part above the point of bending.
ScrOG (Screen of Green), SoG (Sea of Green)
Photoperiod strains: +
Autoflowering strains: +
The use of netting makes it possible to control the vertical striving of the plant, optimize the internal space, develop the vegetative mass, and contribute to an adequate distribution of light and ventilation in all the parts of the plant, thus improving the yield.
The ScrOG method involves placing a coarse mesh net over the seedlings. As the plants mature, the grower distributes and guides branches through the net, creating a uniform horizontal canopy. This approach is helpful in managing the vertical striving of plants and provides support for branches in the later stages of bud formation.
The SoG method involves the compact cultivation of several low-profile plants (up to 65 cm) in a defined space. When growing cannabis with this method, most of the lateral branches are removed, concentrating development in the central and several lateral colas.
Both methods are labor-consuming and require an advanced level of cultivation. However, mastering them increases the chances of achieving the higher expected yields and can significantly shorten the maturation time.
Pre-flowering
- Stage duration: 1-2 weeks
- Lighting regime: 18/6 or 20/4 for autoflowers, switching to 12/12 for photoperiod varieties indoors, at least 8-10 hours of direct sunlight outdoors.
- Indoor microclimate parameters:
- Temperature: 20-24 ℃ during the day and 18-20 ℃ at night
- Relative humidity: 40-50%
The pre-flowering stage is triggered automatically in autoflowering strains and with the change of daylight in photoperiod strains grown outdoors, when day and night divide the twenty-four hours exactly in half. Indoors, growers should reduce the light regime to 12/12 to initiate flowering in photoperiod varieties. With the onset of the pre-flowering stage, cannabis plants slow down slightly in their stretching and, depending on their sex, lay the basis for future flowers or pollen sacs.
If you grow regular strains and your plans do not catch up with the collection of seeds, separate the male plants from the female ones. The implementation of trainings and the application of high-nitrogen fertilizers should also be stopped at this stage, and the nutrient balance should be gradually shifted towards a predominance of phosphorus and potassium. In the pre-flowering stage, cannabis typically begins to emit its distinctive and intense aroma, requiring additional odor control measures.
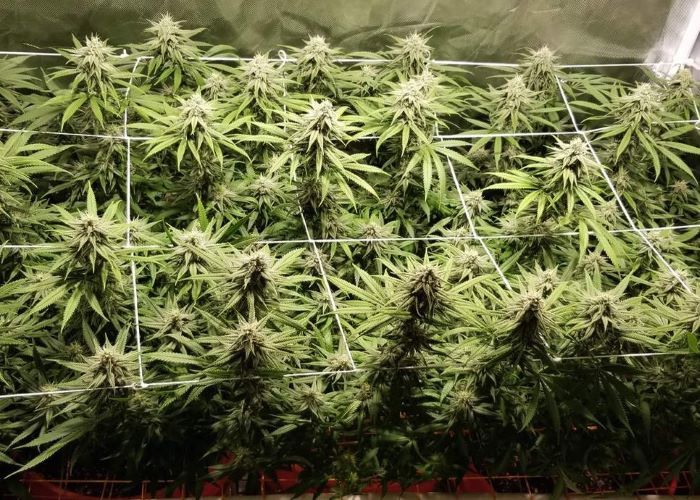
Flowering
- Stage duration: 6-12 weeks
- Lighting regime: 18/6 or 20/4 for autoflowers and 12/12 for photoperiod strains grown indoors, at least 6-8 hours of direct sunlight outdoors.
- Indoor microclimate parameters:
- Temperature: 20-24 ℃ during the day and 18-20 ℃ at night
- Relative humidity: 35-45%
The final stage of the cannabis life cycle. During this period, plants can increase in size by 2-3 times and focus their energy on forming and ripening flowers. When applying fertilizers, minimize nitrogen and increase phosphorus and potassium.
Many varieties will require substantial support for lateral branches, which tend to break under the increased weight of buds. The most common options are netting, the installation of bamboo supports, or garden trellises. Basically, any structure that provides stability and integrity to the structure of the plant will do.
The development of fungal and insect infestations is extremely dangerous in this period, due to the density of the vegetative mass and the impossibility of direct treatment of the flowers with any insecticides or pesticides, even organic ones. Regularly defoliate plants to create a structure open to air circulation and inspect the plant for negative transformations, especially in humid climates or during weather fluctuations.
Harvest
The long weeks of patient work slipped away. Your plant is hummy in its bloom, delighting the eye with branches bent under the weight of fragrant buds. Harvest time is approaching, bringing that exciting and long-awaited culmination of the growing period. In each individual case, it may come at different times, and it is crucial not to miss the "window" of this moment, when the resin filling the flowers will be at the peak of its potential. There are several important factors to consider when determining the exact and correct time to harvest your crop:
The time frame specified by the manufacturer. The description of the strain indicates the expected flowering time, which should not be taken as a direct operational instruction. This timeframe may vary depending on growing conditions, skill level, climate variations, and differences in strain phenotypes. Consider the above information as indicative and focus on the external characteristics of maturity; they won't let you down.
The appearance of plants. During the final steps of the flowering stage, cannabis tends to wilt, which is absolutely normal for living organisms. It is important to distinguish between the natural end of the life cycle and disease conditions or insect infestations that may affect a weakened plant. Therefore, check your cannabis regularly right up to harvest to prevent these circumstances from occurring.
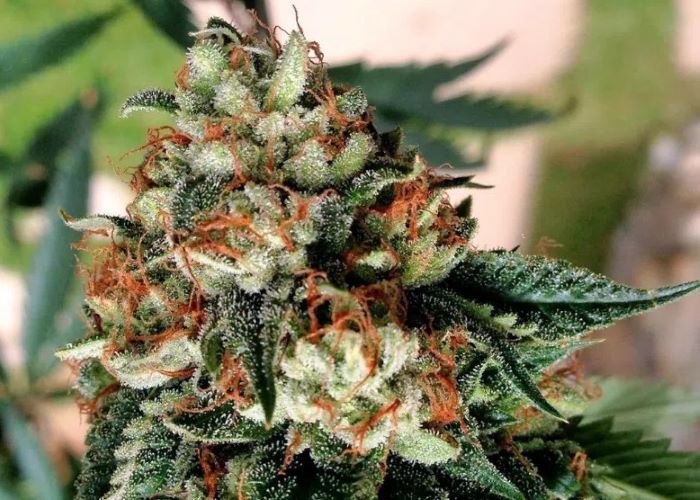
Color change of pistils and trichomes. In the late stages of ripening, the pistils dry and change color from green, yellow, cream, or mint shades to copper and even brown, signaling the approach of harvest. The most reliable indicator of cannabis maturity is the color of its trichomes. You'll need a magnifying glass, handheld microscope, or macro view through your smartphone, as it's often difficult to capture color changes in tiny trichomes with the naked eye. The perfect ratio is three-quarters milky trichomes with slight inclusions of clear and amber ones, indicating a peak concentration of cannabinoids and terpenes in the resin.
Some growers harvest earlier if they notice symptoms of disease or impending bad weather while growing outdoors. In this scenario, the trichomes will be predominantly transparent, resulting in the cerebral effects of cannabinoids without addressing the body component. Simply put, the high will be more intense than the stone. If harvested late, the THC in the cannabis resin will degrade to CBN, coloring the trichomes a deep amber color. The effects delivered by such buds will be highly relaxing and physical, which is regularly used by the producers of medical cannabis to achieve the sedative properties of the product.
At this point, your cannabis is ready to be harvested. Before you reach for your pruning shears, make sure the weather conditions are suitable and that your tools are ready for use. Set up a drying room. It should be dark and relatively cool, with an air temperature of about 22 °C and a relative humidity of 40-50%. Place drying nets or string ropes to hang cannabis brunches. Use a fan if possible. This will keep fresh air circulating during the drying process.
Pruning shears and manicure scissors (more on this below) should be properly sharpened and sterilized. Many growers ignore this advice and end up with challenges in cutting the hardened branches and problems with mold development during the drying process.
Harvesting is literally a sticky thing. Maintain a supply of durable, but not too thick, gloves. The gloves should be comfortable enough to wear and work with, and won't tear when your fingers get stuck together. Then prepare large bags or containers in which you will put the cuttings – branches with buds, sugar and fan leaves, waste. Keep your workplace clean, organized, and consistent to optimize harvest processing and subsequent clean-up. This will help preserve the integrity of your precious flowers.
Let's get started:
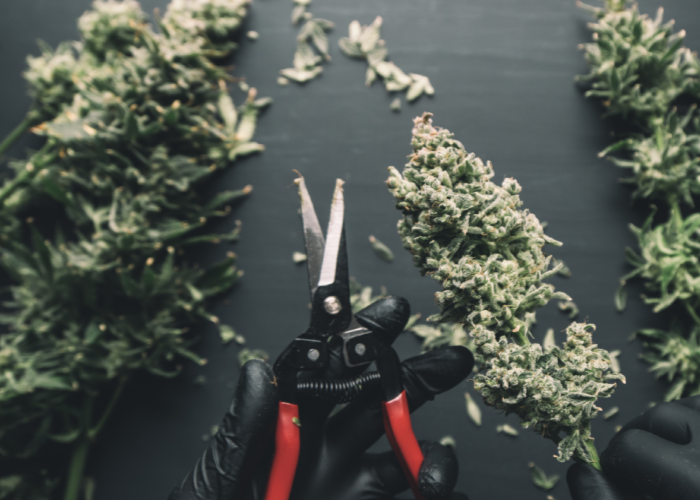
Cut the branches at the stem with sharp pruning shears, or cut the stem 10-15 cm from the soil surface if the plant is small, and you plan to dry it whole. Cut the large leaves. They do not have much potential, and you will most likely get rid of them. Hang the branches with buds in a drying room. The crackling of branches when they are bent is a distinctive sign of dry flowers. The buds should be elastic and not brittle. It is very convenient to work with flowers at this time. The resin will dry and won't be so sticky to the gloves. Cut off all flowers from dry branches, leaving a 2-3 cm "tail" to make further processing easier. Remove dried sugar and fan leaves (trim) from buds with the manicure scissors. Work slowly to avoid cutting off the main body of the flower. Trim can be used to make concentrates, tinctures, and canna-butter, which can then be used as an ingredient to make delicious muffins or cakes.
Indoor
More and more growers are choosing to cultivate cannabis indoors, which is no surprise as this space offers convenience, ultimate control over processes, and flexibility in setting conditions. Growing indoors allows enthusiasts to create unique growboxes and experiment with equipment, and if they are not willing to invest too much effort, they can always go with a ready-made solution. There is a place for everyone, regardless of budget, level of experience and ambition, the main thing is to apply a little patience and determination, and the result will not keep you waiting.
Pros and Cons
Cultivating cannabis indoors offers growers unparalleled advantages in terms of control and customization of the environment, but it comes with its own set of challenges. Let's take a look at the possibilities and limitations of this process:
Pros:
- a perfect option for those who live within city limits or in a region with an extreme climate but want to try their hand at growing,
- with specialized and customized equipment, one can easily create and maintain the optimal conditions for the strain requirements and stage of development of cannabis without worrying about changes in weather or seasons,
- both labor and time costs can be significantly reduced by installing auxiliary equipment to automate the process,
- by following all the rules of indoor cultivation (in an enclosed space), the risk of pathogen and insect infestation tends to zero,
- with all the precautions, stealth, and odor control, your hobby will be as safe as possible,
- the flexibility of lighting control in growing photoperiodic strains gives you the ability to manage plant size, thereby increasing the final yield.
Cons:
- setting up and operating a grow room is more expensive than growing outdoors. The lion's share of the budget is spent on the purchase of technical aids, and the rest on system maintenance and electricity bills,
- the need to designate a part of the living space or to have access to a suitable space (attic, basement, etc.),
- the reliability of the system you build is critical. Use high-quality components and equipment to eliminate the risk of malfunction at the most critical moment, as well as the risk of a fire outbreak,
- plants grown indoors require active care and monitoring throughout the process. Be sure you are ready to give the plants enough personal time and attention for the entire cycle.
What Are the Right Strains to Grow Indoors?
Today's grower has an endless array of carefully selected cannabis strains to choose from, each with a unique set of characteristics and qualities. If there is no question regarding the desired effect and organoleptic properties, there may still be some issues related to other properties. To avoid this, when picking a strain to grow indoors, ask yourself a few questions, and judging by the answers, you will be on the right track.
What is my level of expertise?
Growing certain strains, particularly pure sativas and sativa-dominant hybrids, requires advanced growing skills due to their capricious nature and long maturation periods. Growing photoperiodic strains requires the application of training techniques, both to tame the inexorable stretching and to increase yield rates. Keeping an open mind on your set of skills will allow you to choose the strain that will not only give you a bountiful harvest, but will also teach you something new about cannabis cultivation, inspiring you to further experiments.
What is the size and technical environment of my grow room?
The size of the adult plant is one of the most crucial factors when choosing seeds to grow indoors. Photoperiodic strains can often exceed two meters in height, while some autoflowering varieties barely reach 50 cm. Indica tends to branch extensively, reaching an almost spherical structure, while sativa tends to shoot upwards, forming a "Christmas tree" structure with spreading branches. For many strains, due to the extremely intense odor of the plants during the flowering period, it is imperative to install an air filtration system. By organizing your grow space wisely, you'll provide a comfortable environment for your cannabis to thrive, enjoying the true pleasure of the process and maximizing the benefits at the end of the cycle.
What do I expect from grow, and how much effort and time am I willing to put into it?
Think about what goal you are pursuing. Choose autoflowering or fast-flowering strains labeled "For Beginners" if you are driven by a strong desire to quickly and effortlessly obtain a modest supply of buds for personal consumption. For those who want to master new practical skills or reap a bountiful harvest, it is worth researching the specific requirements of strains and picking one that can meet your conditions, demands, and expectations.
What harvest amount can I expect?
It is generally accepted that the duration of the flowering stage is directly related to yield. However, this principle does not always apply to indica strains, as some of them, characterized by a flowering period of 7-9 weeks, can produce a generous harvest of up to 800-1000 g/m². Mastering the training techniques results in impressive harvest rates, even in a compact DIY growbox. Instead of strictly following an algorithm, understand the concept of how cannabis yields are formed and adapt it to your specific growing conditions.
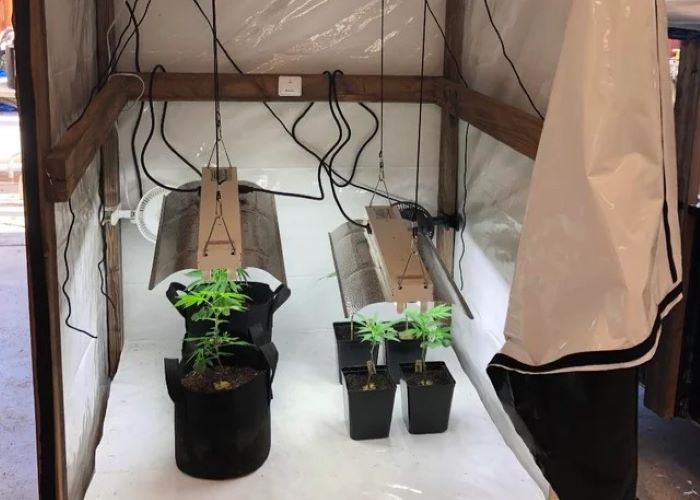
Space. Growbox or Growtent?
Organizing your grow space is a key milestone on your path to overall success. With motivation, enthusiasm, theoretical knowledge, and advanced hands-on experience, you can grow cannabis virtually anywhere, as long as you know where and how to use the technical equipment. Skipping the description of daring experiments carried out by do-it-yourself wizards, we will focus on reviewing the two most common options for growing cannabis indoors: growbox and growtent.
A growbox is a solid construction made of rigid materials – metal, wood, or cardboard coated with reflective material on the inside and fitted with the necessary equipment. The main advantage of a growbox is its compact and portable design, as well as the possibility of integrating it into your living space under the guise of a bedside table, closet, or refrigerator, which certainly adds points to the secrecy of your hobby.
A growbox is easy to assemble and does not require a substantial investment, so beginners often choose this option without thinking too much. However, its dimensions may not be sufficient to grow several plants, so if you plan to expand your production at some point in the future, we recommend you consider an option with a growtent.
A growtent is made of lightweight and flexible materials, making it easy to assemble, transport, and store. It provides the opportunity to establish a true plantation with numerous plant species. The current market is flooded with a variety of growtents available in many configurations and sizes to suit your preferences, expectations, and needs, opening up endless opportunities for growing different strains and performing experiments that are not possible in a confined space.
It should be noted that a growtent is a bit challenging to operate, takes up a lot of space, and requires knowledge of system assembly, making it difficult for novice growers to use. However, if you have several successful growing cycles under your belt, have been thinking about how to use an empty space in your home, and have the financial savings, a growtent is exactly what you need!
Hydroponic and Aeroponic Systems
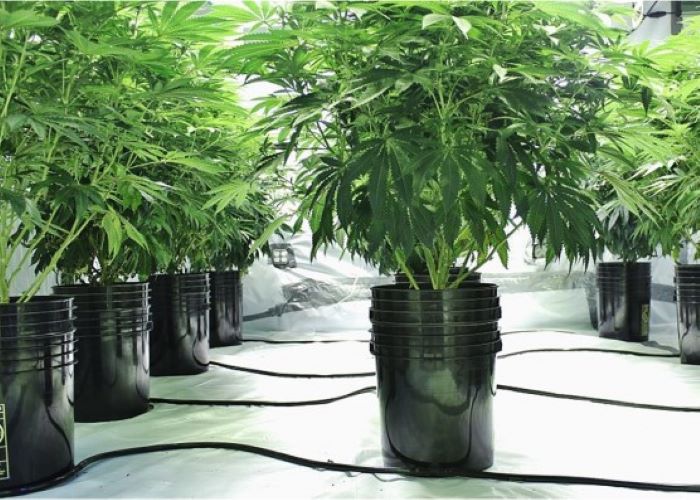
Hydroponics is a type of horticulture used to grow cannabis at home. In recent years, it has become increasingly popular due to the availability of the necessary equipment and increased technical competence among amateur growers.
Today's market is brimming with variations of hydroponic systems: deep water culture (DWC), nutrient film technique (NFT), Ebb and Flow, Drip, and aeroponics. Technically different, they operate on the same principle when the cannabis root system is placed in water or in an inert substrate (rockwool, coco blocks, expanded clay, pebbles, zeolite, etc.) without the use of soil. Plants absorb the essential elements from the nutrient solution that is regularly delivered to the root zone.
In aeroponic cultivation, the nutrition mechanism is carried out by delivering a nutrient solution in the form of a mist to the roots of plants placed in separate compartments. This method provides extensive root aeration without the need to constantly keep the roots in water or periodically drown them. Both methods offer the opportunity to achieve the highest yields possible and maximize the varietal potential of cannabis while accelerating maturation.
The main disadvantage of hydroponics and aeroponics is the lack of a "buffer zone" between the cannabis roots and the nutrient solution that is common in soil cultivation. Therefore, the balance of nutrient elements, as well as pH and ppm readings, require strict monitoring throughout the cycle, which can be too challenging for the inexperienced grower. Moreover, the cost of such systems and their accessories is quite high, and the operation itself requires confident technical and cultivation skills.
Choosing the Right Container
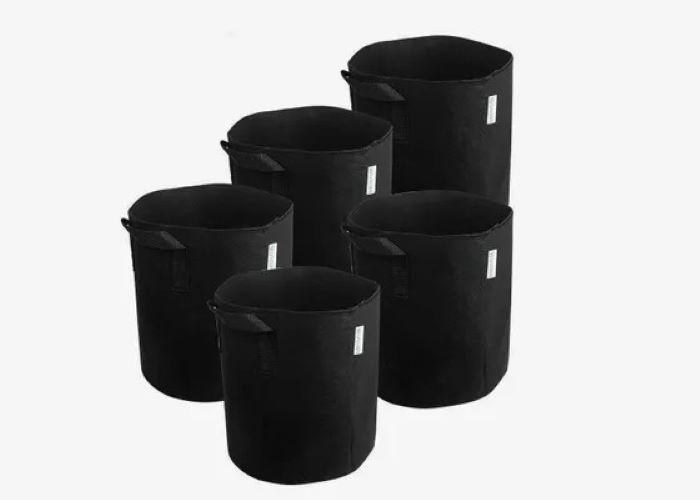
The right choice of a suitable container is one of the most important conditions for a healthy and productive growth of the plant's root system, which has a significant influence on the final yield. There are several factors to consider when determining which container is perfect for your plants:
The size of plants
If you choose photoperiodic strains, start with small garden pots with a capacity of 5-7 liters and transplant the plant as it grows to larger pots, sometimes up to 50 liters for indoor cultivation and up to 70 liters for outdoor cultivation. Autoflowers, characterized by their modest size, can be grown in pots with a capacity of 7-15 liters. Due to their intolerance to transplanting, it is desirable to plant the seed or seedling directly into the first and final pot.
The presence of drainage holes for the removal of excess moisture
Cannabis does not tolerate too wet soil and responds to such disrespect with a depressed state. In neglected cases, it develops root rot, which, in most cases, leads to the loss of the plant.
Mobility of plants
If you want to move plants, select containers with handles or buy a garden cart. The latter can be used to load pots and move plants to a safe place in case of bad weather.
Color of your pot
When growing cannabis outdoors, choose light-tight pots colored in light shades. They reflect sunlight, preventing the root system from overheating in hot weather.
Your best bet is fabric pots (smartpots or growbags), which provide excellent drainage and perfect aeration. Your plants, thriving in growbags, will require more frequent watering as they tend to dry out faster. Another option for the best choice of pot would be plastic airpots. Its prefabricated design, bottom with drainage holes, and revolutionary concept of the wall, consisting of rows of conical "spikes", promote constant air access and improved development of the root system, preventing it from getting entangled.
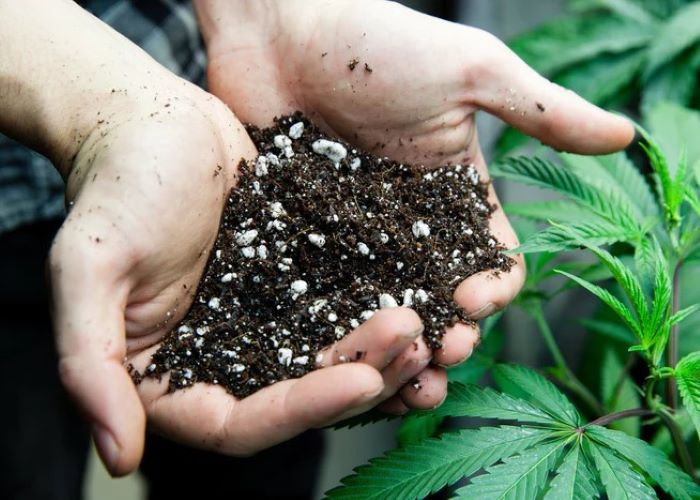
Soil or Inert Substrate?
If you want to grow cannabis in pot, you'll eventually face the question of what kind of medium to choose. The two most common options are nutrient-rich organic soil and inert substrate. Both have their pros and cons, and the right choice depends on your goals and skills.
Soil is the traditional, classic medium for growing cannabis at home. It contains all the nutrients that cannabis needs during the initial stages of development and creates a favorable environment for beneficial microorganisms. It is also more tolerant of pH and ppm fluctuations, and acts as a filter between the roots and water oversaturated with fertilizers. In addition, it is suitable for novice growers taking their first steps in cannabis cultivation. A significant disadvantage of the soil is its ability to retain excessive amounts of water, which, if regularly overwatered, creates ideal conditions for the development of root rot. Do not overwater, and always keep the soil in the pot slightly moist.
By using an inert substrate, the grower maintains full control over the nutrient balance, pH, and ppm levels of the nutrient solution, which, when mastered, optimizes cultivation. In general, it is a more resource-demanding medium, as plant development is entirely dependent on the accuracy of the measuring tools and your attention to details. The lack of biological reactivity in the medium reduces the risk of cannabis diseases, but the need for continuous fertilization throughout the cycle and the use of additional equipment may increase your costs. The inert substrate is suitable for experienced growers who want to be in control of the situation and are willing to put more attention and effort into the whole process.
Regardless of the medium you choose, routinely monitor the pH and ppm levels of your watering solution and drainage water to ensure the healthy development of your plants.
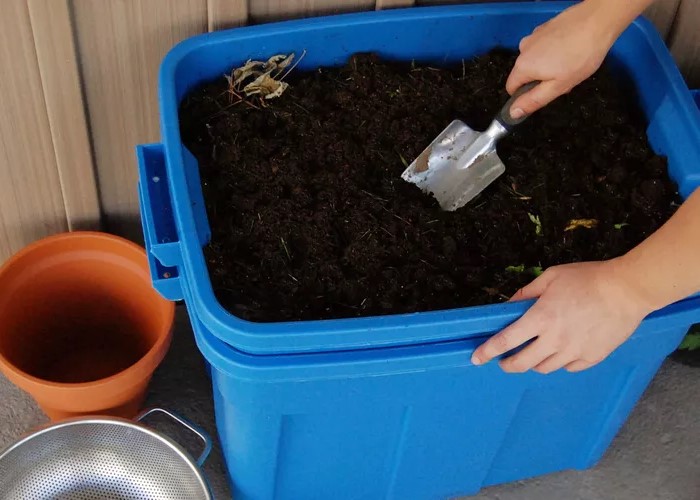
Preparing the Perfect Soil Mix at Home
Pre-packaged substrates sold at garden supply stores are a quick and convenient way to grow cannabis. The practicality of this approach tends to lose its potential at the stage of active vegetation, forcing the grower to apply fertilizers and maintain the vital functions of the plant. One of the solutions to this challenge is a homemade soil mix, or "supersoil" as it is called, that can provide cannabis with all the nutrients it needs during the growing process. However, its preparation usually involves a certain amount of financial and time costs, as well as a careful adjustment of the ratio of the components. If the substrate is not mixed properly, it will not have the desired properties, and no magic will happen. However, if you approach the whole process in a responsible and dedicated manner, you will not only notice how much healthier your plants will look, but you will also enjoy a superior-quality product that will make all the effort and expense well worth it.
In order to prepare your homemade organic substrate, it is important to understand the role that soil plays in the development of cannabis and the criteria it should meet in order to play its part to the fullest. The key benefits of a properly prepared soil mixture are:
Nutritional value. A high-quality, nutrient-rich soil should contain all the necessary micro- and macronutrients that cannabis requires throughout its life cycle.
Drainability. Cannabis thrives in a loose, airy soil composition, and excess moisture is easily drained away without stagnation. Coco coir, perlite, vermiculite, zeolite, and sand added to the substrate in specific proportions will get the job done right.
A balanced soil microbiome. No less than a significant aspect of a healthy soil is the maintenance of the activity of its beneficial microorganisms. Soil-friendly fungi, such as mycorrhizae and trichoderma, promote better nutrient uptake by roots and protect plants from disease, boosting their immunity.
Neutral equilibrium. The optimum soil acidity level is pH 6-6.5. This is the range that ensures adequate nutrient uptake by the roots.
You will need a set of tools and supplies to prepare the perfect supersoil:

- a bin for composting. This is the container in which you will mix and activate the components,
- a tough plastic film or tarp. It can be used as a liner and cover to "cure" the components when a large amount of substrate is required,
- rake, or a tool for even distribution and mixing of components,
- gloves, that will protect hands from direct contact with some additives and soil,
- a trowel for dispensing components.
The next step in the process is the selection of the base component. You can use a pre-packaged organic soil or neutral soil that you bought at the garden supply store for your houseplants. You can even use your garden soil after testing it for drainage properties, acidity, and nutrient saturation.
There are many options for amending the soil mix with nutrients. You can use compost, biohumus, bat guano, seaweed, shell and bone meal, wood ash, manure, and other natural ingredients. Each component delivers a unique set of nutrients and, when used properly, can provide the cannabis plant with everything it needs without unnecessary fertilization or supplementation. It is important to find out what components are available in your area and how they fit your soil. Please note that bone meal and blood meal may attract carnivorous animals such as dogs or bears, so be careful when using them outdoors.
The amounts and proportions of supplements will depend on the initial composition of the soil and the amount of substrate you require for planting. Therefore, a targeted approach to the process and diligent research of available resources will help you create the perfect soil mix for cannabis. You can add other components as needed, or you can use the standard recipe:
The standard recipe for supersoil:
- 5 parts of the base substrate,
- 2 parts of compost and/or biohumus,
- 2 parts of coco coir,
- 1 part of perlite and/or vermiculite,
- ~ 5% of bat guano and/or poultry litter,
- ~ 5% of seaweed powder.
Distribute three parts of the base substrate on a PE film, tarp, or container, and add one part of compost and one part of coco coir. Thoroughly distribute and mix with a rake. Cover the mixture with the remaining two parts of substrate, add the second part of compost, part of perlite, and/or vermiculite with guano or poultry litter. Mix it thoroughly. Keep adding components and mixing until you have a uniform consistency. You can also add other nutrients by following the manufacturer's recommended dosages.
Once saturated, store the ready substrate in a closed container in a warm place or expose it to sunlight for 2-3 months. Keep the soil mix slightly moist. Moisture maintains the activity of soil microorganisms, ensuring the decomposition of fertilizers. When the process is complete, check the pH and ppm of the drainage water and adjust if necessary.
The preparation of the supersoil is a rather time-consuming process, so the purchase of components should be considered in advance. This is due to the fact that most nutrient supplements are quite aggressive in nature and, in unfermented form, can burn the delicate roots of the plant. For the same reason, it is not recommended to plant seedlings or sprouts in supersoil. To mitigate this impact, mix one part of prepared supersoil with three parts of inert substrate (e.g., coconut fiber). This allows your plants to adapt to the "nutritious" conditions and makes transplanting to a new medium more comfortable and safer.
Required Equipment
While cannabis grown outdoors basks in the sunlight and exposes its leaves to the warm summer rains, the care of maintaining the microclimate indoors falls entirely on the shoulders of the grower. This is where scientific advances come into play, bringing a wide range of cutting-edge grow equipment to help passionate cannabis growers. All you need to do is shape your budget and choose the optimal option.
In this section, we will cover all the basic technical set-ups necessary for a successful indoor cannabis grow, whether you use a growbox, growtent, or DIY designs.
Lighting
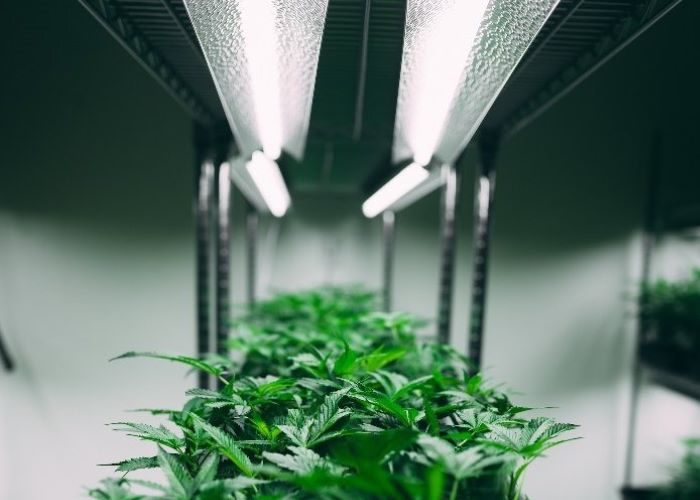
One of the most vital aspects of indoor cannabis cultivation is adequate lighting with spectral variation and combination, which can be achieved by installing appropriate lighting equipment. Indoor grow lights come in a variety of configurations, wattages, and spectrums, and it's up to you to determine what you need, taking into account the specifics of your grow space and budget.
Choosing a Worklight
There are several types of grow lights, each with specifications that are more or less tailored to the requirements of the plant at a particular stage of development.
Fluorescent lamps
Fluorescent lamps come in two types: compact fluorescent lamps (CFLs) and fluorescent lamp type T5. CFLs are the least expensive and most available option. They feature a wide range of wattage and color temperatures, compactness, energy efficiency, simplicity, and convenience. However, do not expect an amazing crop if you use only this type of light for the entire grow cycle, as the light output ratio of CFLs is fair to middling. Their mild, stray-light emission is ideal for backlighting, lighting clones, seedlings, and sprouts, or growing a single compact autoflower.
Compared to CFLs, T5s have a higher luminous efficacy and can be used as side backlighting due to their design. Typically, their emission intensity is still insufficient as a stand-alone light source, but this can be compensated for by placing a larger number of fixtures in a grow space.
Sodium discharge lamps
The golden standard and "happy middle ground" in terms of price-to-light output ratio, and the most common type of lighting for cannabis. The crops grown under their light are bountiful and of a high quality. There are metal halide lamps (MHL), which emit a blue (cold) spectrum, and high-pressure sodium lamps (HPS), which emit a red (warm) spectrum.
High-pressure sodium lamps are a less expensive option than LEDs of similar wattage. However, the low cost is offset by high energy costs and the need to purchase additional equipment such as ballasts and reflectors. In addition, their increased heat dissipation requires extensive climate control, and their tendency to wear out will eventually force the grower to replace the lighting elements after a year or two of active use.
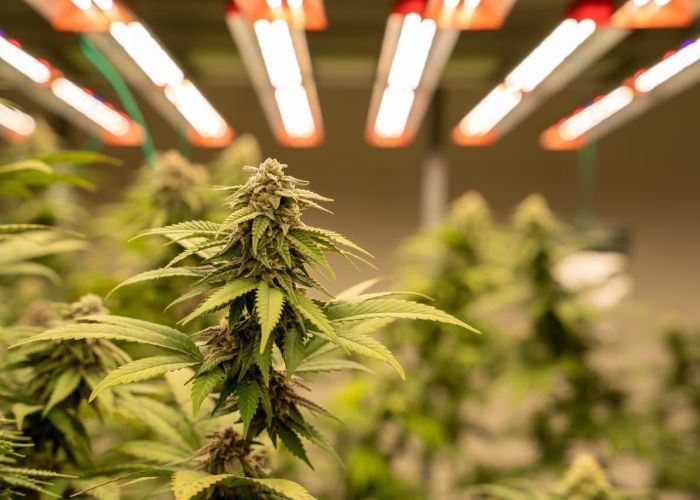
Light-emitting diode lamps (LED)
A modern, efficient, long-lasting, and durable type of lighting that actually requires a greater financial investment. If you are planning to do more than one cycle, we recommend that you consider this particular option, as the return on investment over time is compelling. LED lights are energy efficient, multifunctional, easy to use, virtually do not heat up, and do not require additional microclimate adjustment. They also provide a spectrum of light that best suits the needs of plants at all stages of development. The criterion of performance is often determined by the price. It should not be too low. Do your research, choose a reliable supplier, and the reward for your time and patience will be a robust harvest and high-quality resinous buds.
How to Calculate the Capacity of a Worklight?
The calculation of the lighting capacity depends on several factors, including the area of the grow space, the number of plants to be grown, the requirements of the strain, and the stage of the plant's development. Therefore, it is important to keep in mind that the efficiency of luminaires in different configurations also differs in the context of lighting. A 250W HPS lamp is not equivalent to a LED panel of similar wattage. This is due to the fact that sodium lamps are installed at a greater distance from the plant than LED lamps, resulting in greater scattering of photosynthetically active radiation (PAR). With this in mind, through experimentation and observation, the optimal wattage per single standard-sized cannabis plant was derived based on the recommended distance between the top of the plant and the luminaire. For HPS lamps, the approximate rate is 70-100 Watts per plant, for LED lamps – 50-70 Watts. This capacity will be enough to cover the needs of the plant at every stage of its development. Moreover, the option of switching spectrums and regulating the lighting power by means of the dimming function optimizes the temperature and intensity of the luminous flux at different stages of the plant's development.
Fluorescent lamps (T5 or CFL) are a good choice for small growboxes and for the lighting of seedlings. For this purpose, several lamps with a combined output of 100-200 Watts will suffice. If you are planning to grow more than one plant, it is recommended that you multiply the wattage rating or install lamps with a higher energy efficiency.
One of the most important aspects of lighting cannabis indoors is the even distribution of the luminous flux. Apart from the application of training techniques (SoG/ScrOG), shaping a uniform canopy can be achieved by using several lower-wattage lamps instead of one super powerful. This approach will not only prevent excessive heating of the grow space air, but will also optimize the efficiency of the luminous flux.
Light Spectrum and Color Temperature
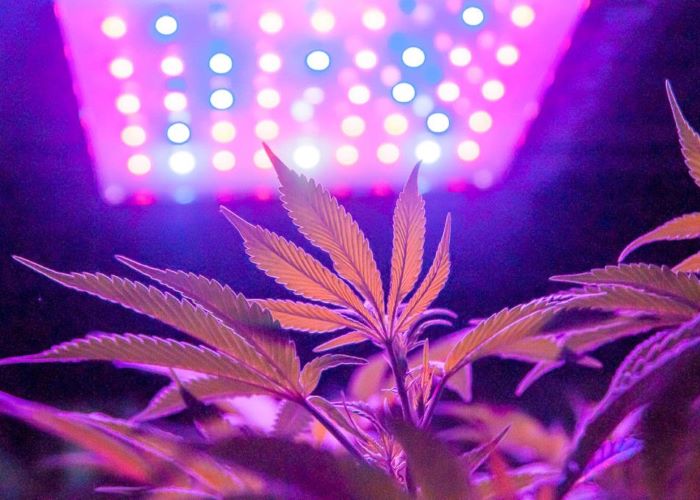
The sun is a natural source of light. Its radiation provides the cannabis plant with life-sustaining energy and serves as a specific signaling system that informs the plant of impending environmental changes to which it must adapt in order to survive. One of its characteristics that ensures the uninterrupted "reception" of these signals is the length and frequency of the electromagnetic wave that is part of the solar radiation, or, simply put, the spectrum of light. It represents a continuous beam of photons traveling through space and is typically measured in nanometers (nm). The spectrum visible to the human eye is between 380-750 nm. However, plants absorb light in the range of 200-1000 nm. Although the sun emits a full spectrum of light and all of its components are equally important to the development of cannabis, the blue (cool) and red (warm) spectrums should be given special consideration when setting up artificial lighting indoors. These are the spectrums that play a key role in the vital processes of the plant.
The blue spectrum (400-500 nm)
It is responsible for photosynthesis and favors the formation of lush green mass, preventing excessive stretching of plants. The cannabis plant needs the blue spectrum during the vegetative stage, as it promotes the development of vegetative mass to increase the area of light absorption. In natural conditions, the greatest concentration of the blue spectrum is observed in spring and summer, when the angle of the sun's rays is at its highest point in the sky, allowing the radiation to penetrate unimpeded through the layers of the atmosphere. Indoors, the traditional lighting source of the predominant blue spectrum is LED lamps with the appropriate preset of light-emitting diodes, metal halide, and fluorescent lamps.
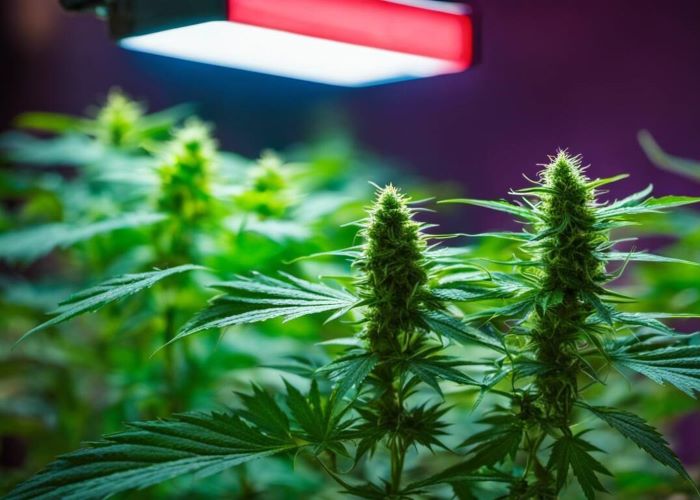
The red spectrum (610-720 nm)
It is important during the flowering stage and is responsible for the formation of large buds and, therefore, improved yields. In nature, this effect is achieved by the prevalence of red (warm) solar radiation in the fall, which signals to cannabis the impending onset of cold weather and the need to complete its life cycle as quickly and productively as possible. When growing cannabis indoors, full-spectrum LED lamps, including those with a red spectrum, and HPS lamps are commonly used as the light source for the flowering stage.
However, it's not just vegetation and flowering that keep cannabis alive. In addition to these two key stages of plant development, there are a myriad of processes that take place in the plant's tissues that, in one way or another, are responsible for ensuring that your grow goes smoothly, and your harvest surprises even weathered experts. The course of these processes depends to some extent on the distinct manifestations of the following spectrums:
Green (500-550 nm)
It has high penetrating properties, allowing adequate light to reach the lower levels of a plant and develop the lower leaves, which traditionally suffer from a lack of light. It signals cannabis to move on to the next stage. This spectrum can be used at night without disturbance to the plant and without fear of the appearance of hermaphroditism.
Orange (550-610 nm)
Builds up the health of the vegetative mass.
Far red (720-1000 nm)
Increases the intensity of cell fission, prevents stretching of the plant, and helps to form large and dense flowers.
Ultra-violet emission
A specific subject of controversy and debate is the use of the ultraviolet (UV) spectrum, which, according to adherents of this theory, contributes to the activation of the plant's defense functions, thereby increasing immunity, trichome productivity, and thus the concentration of THC in the resin. The primary driver of this view is the evidence of cannabis cultivation in certain geographical locations high above sea level, on mountain slopes, where UV radiation levels are much higher than in lowland areas. Nevertheless, it is worth delving into this specific topic for a better understanding, as it is a bit more complex than it may seem at first glance.
There are three types of UV radiation: UVA, UVB, and UVC. They differ fundamentally in both their beneficial and destructive effects on living tissue. Therefore, it is crucial to distinguish between them, at least in theory, since they all lie below the line of the visible spectrum.
Near ultraviolet or UVA (315-400 nm)
The only type of UV that almost completely reaches the Earth's surface and therefore actively participates in the vital activity of living organisms. It is believed by many growers that UVA induces increased resin build-up when backlighting cannabis with UVA light on a 2/24 regime throughout the flowering stage.
Medium ultraviolet or UVB (280-315 nm)
Only 1-5% of it reaches us, as it is almost completely absorbed by the atmosphere. It is considered dangerous to humans, but is used by enthusiasts in measured amounts during the final weeks of flowering to increase the production of terpenes and cannabinoids in cannabis resin.
Far ultraviolet or UVC (100-280 nm)
Also known as gamma rays. This radiation is highly dangerous to humans and cannabis alike, is never used by anyone, and is fortunately completely absorbed by the Earth's atmosphere shell.
High-pressure sodium discharge lamps can meet the plants' need for near UV light, but for the validity of the experiment, it is probably worthwhile to purchase a specialized UV lighting system that also provides some UVB radiation. In this scenario, to minimize UV damage when working with plants, be sure to use protective equipment such as UV goggles and arm cover sleeves to shield your skin.
Despite its name, the color temperature has no effect on the radiant heat. It is measured in Kelvin degrees (K) and describes the pattern of lighting emitted by a source. The higher the value in Kelvins, the "cooler" the visual perception of light will be, and vice versa. Lamps with a color temperature of 5500-6500K emit a cool light and are perfect for the vegetative stage. Lamps with a color temperature of 2800K produce a warm spectrum of light that promotes the proper formation of large, resinous buds. Light sources with a color temperature of 3500-4500K are considered versatile and can be used at all stages of the cannabis life cycle.
What is the Distance to Install a Worklight?
Setting the lights at the optimal distance from the top of the plant is a key point in the lighting aspect. If you get your calculations wrong and place the light source too high or too low, the consequences in the form of heat/light burn or an overly elongated plant structure will not be slow in coming. Therefore, it is essential to fine-tune the lighting during installation so that a barely-alive plant does not require urgent resuscitation. So, what is the distance at which the luminaires should be installed?
This is influenced by three factors: the type of lamp used, its wattage, and the stage of development of the plant. The level of heat dissipation from the light source should be taken into account. Sodium discharge lamps (HPS) have the highest heat dissipation rate and can heat up to 300 ℃ on the bulb surface. At the seedling stage, it is recommended that lamps of this type be placed at a height of 70-90 cm from the tops of plants. As you get closer to the flowering stage, you can gradually reduce this distance to 45-60 cm for 150-240W lamps and 60-80 cm for 400W lamps. To ensure the lamp is properly positioned in the grow space, place the palm of your hand near the top of the plant. If you feel the heat, raise the light source until the temperature is most comfortable.
LED lights typically do not cause heat burns, but the intensity of their light output may be too intense for cannabis. This is especially important in the early stages of plant development, when the distance between the light source and the top of the plant should be at least 60-70 cm. During the vegetative stage, lower the lights to 45-50 cm for wattages up to 450W and 50-60 cm for 450W, and during the flowering stage – lower them further to 5-10 cm.
Fluorescent lamps are considered thermally safe, but even seemingly harmless CFLs in large quantities can make things hot for young cannabis plants. Illumination of seedlings and sprouts can be done with 60W fluorescent lamps installed at a height of 15-25 cm. For 100-250W lamps suitable for vegetation and flowering, the optimal distance is 20-30 cm.
Please note that plants change their light requirements as they mature, so it is essential to monitor them regularly and adjust the distance to the tops if necessary. To ensure that these changes do not require a major rearrangement of settings, consider alternatives, such as purchasing height-adjustable lamp stands.
Lighting Regime

In the wild, the lighting regime is not subject to manual adjustment, and cannabis develops according to local natural cycles. Indoors, to manage the stages of cannabis development, growers need to control the duration of daylight hours. In particular, this applies to photoperiod strains that require 18-20 hours of light per day during the vegetative stage. Flowering is commonly initiated by reducing the light regime to 12/12 and maintaining it in this range until harvest.
Autoflowering strains, following the genetic traits inherited from ruderalis, do not require a change in daylight hours to switch to flowering, allowing growers to keep them on the same light regime throughout the cycle. The default light regime for autoflowers is 18/6 and/or 20/4.
There are also two less common lighting regimes practiced by growers – 16/8 and 24/0. The first is usually applied as soothing to plants that have experienced stress and burns. The second, meanwhile, has caused some controversy. Some claim that 24-hour lighting during the vegetative stage promotes the maximum development of green mass. Their opponents believe that this approach is detrimental to cannabis because the dark phase of photosynthesis, when the energy gained during daylight hours is converted into nutrients, suffers. We stand by the second point of view and believe that the importance of healthy rest for any living thing, including cannabis, should not be underestimated.
In addition, there is the method of plunging cannabis into pitch-black darkness for 2-3 days before harvesting. This approach is considered positive for the greater production of resin with a higher concentration of cannabinoids and terpenes. This method has not yet been scientifically approved, but many growers actively use it and claim a positive effect on the quality of their flowers. You can be a part of this global experiment yourself and share the results on our forum.
And last but not least, strictly follow the lighting regime to avoid fluctuations in the duration of daylight hours. Cannabis, even autoflowering, can exhibit hermaphroditic traits when exposed to sudden changes in light, jeopardizing the success of the entire crop. If the lighting regime is not maintained, the photoperiod strains can switch to flowering out of the expected time and disrupt your plans for a bountiful harvest. In the age of high technology, installing a standard, inexpensive automatic light duration controller is not beyond the realm of possibility or difficult to implement.
Optimal Microclimate
Indoor microclimate is a complex and nuanced set of interrelated processes that can be challenging to adjust to, especially for beginners. Imagine a music equalizer with multiple parameters where a change in one band immediately affects all the others, changing the sound... Besides, there are dozens of factors that influence one or another parameter, and all of them should be taken into account when organizing the "sound" of the grow space. Cannabis is highly sensitive to environmental fluctuations, and even minor changes can negatively impact the growth and health of the plant. That is why it is important to have a reliable climate control system that will make the growing process as streamlined and straightforward as possible.
Before purchasing equipment, evaluate the grow space in which you plan to cultivate cannabis. Consider temperature and humidity, as well as weather conditions. For example, if you plan to grow cannabis in your attic during the heat of the summer, think about the option of lowering the temperature and humidifying the air. If you choose the basement in winter, the situation will be exactly the opposite, and you will most likely need a heater. Don't forget the saying, "Buy nice or pay twice". It is far better to invest in reliable and high-quality equipment than to save money and deal with constant breakdowns and demotivating complications. With reliable sensors and devices, you can be sure of the accuracy of readings and the safety of your home.
Temperature
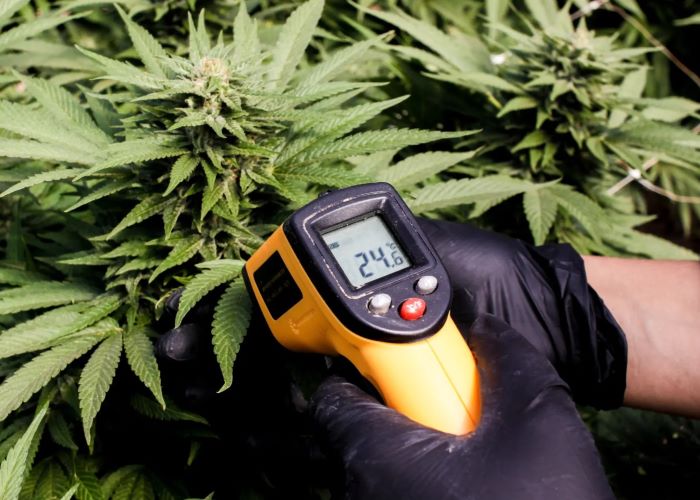
The basic source of information on the temperature in your grow space is a thermometer. It is optional (but not necessary) to consider installing an infrared thermometer that measures the surface temperature of leaves or soil to provide a more accurate understanding of the microclimate. The thermostatic switch automatically adjusts the temperature by turning on ventilation or heating equipment.
Relative Humidity (RH)
When growing cannabis indoors, it is important to control humidity, as the presence of excess moisture can lead to the development of mold and fungus. It is especially damaging during the flowering stage. The hygrometer is used to measure the humidity level, and the humidistat automatically maintains the preset values. Dehumidifiers and humidifiers perform their respective functions. If your grow room is not equipped with an automatic climate control system, you will need to constantly monitor and manually adjust the parameters. Ventilation or placing trays filled with water will maintain appropriate humidity levels. Keep in mind that changing the humidity level has a proportional effect on the air temperature: the dehumidifier increases it while the humidifier decreases. Plants also ooze moisture from the pores of the leaf plates in a process called transpiration, which must be taken into account when growing large specimens or multiple plants.
Ventilation
Properly adjusted ventilation is the foundation of comfortable indoor growing. It regulates all microclimate parameters, provides fresh air, which is essential for the healthy development of cannabis, contributes to the elimination of excessive temperature and humidity, reduces the risk of disease or pest infestation. Quite a lot for one element of the system. Don't you think so? However, this effect can only be achieved by using high-quality and properly matched technical solutions and by ensuring that the grow room is completely airtight once the equipment is set up and running. The latter can be easily checked by lighting an ordinary incense stick near the air inlet or outlet opening. If the smoke flows straight to it or away from it, you have done everything right.
There are three types of ventilation systems:
Passive ventilation
It provides natural airflow stimulated by the temperature difference between the inlet and outlet openings. In cannabis cultivation, this method is used in some growtent designs.
Exhaust-duct ventilation
It involves an exhaust duct and an inlet opening through which air is passively or actively supplied, for example, via simple computer coolers. Efficient in compact growboxes or growtents that require a wide air inlet (3-4 times larger than the outlet) and a powerful duct fan to remove excessive temperature when using HPS lamps.
Input-outlet ventilation
The most common and effective ventilation system for growing cannabis. It optimizes the fresh air flow in the grow room with the option of full automation, which greatly facilitates its operation and simplifies the cultivation process.
Standard Configuration of the Ventilation System
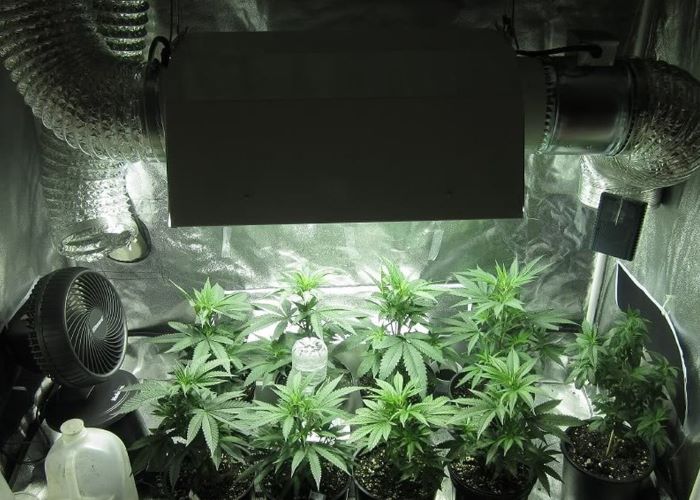
Intake fan (computer cooler) provides fresh, cool air inside your grow room. It is located at the bottom.
Exhaust (duct) fan removes the heated air mass from the grow room. Mounted at the top, diagonally from the inlet opening.
Oscillating fans ensure the intended lateral air circulation, creating natural conditions for the development of strong stems and the supply of fresh air to the internal structure of the plant, preventing the appearance of mold and insects. Oscillating fans are often arranged crosswise so that the airflow from them creates swirls that comfortably and evenly ventilate the entire grow room and plant area. When installing oscillating fans, avoid directing them at the foliage, as this may result in windburn, causing the leaves in that area to droop and become claw-shaped.
Optional Equipment for the Ventilation System
Inline fan
The ultimate must-have for the indoor cultivation of cannabis. Depending on the model, they are characterized by a low noise level and a compact overall size. The performance of inline fans is way ahead of that of general-purpose exhaust fans. There are models with automatic temperature and speed control, as well as units combining air intake and exhaust.
Air duct
It is used for connection to the inline fan. Air ducts are made of flexible or rigid materials, often corrugated. It is not required for small-scale cultivation, where the inline fan can be mounted directly to the wall of a growbox. Moreover, the air duct mounted externally is visually and aesthetically unappealing and reveals the true purpose of an inconspicuous cabinet lurking in the corner of your room.
Regular oscillating fan
Installed at the bottom of the grow space, it ensures the supply of fresh air, the circulation of air masses, and the maintenance of an optimal microclimate.
Inline (duct) fan speed controller
It allows you to adjust the fan speed, which is especially useful if the model is too powerful for your grow room.
How to calculate the required ventilation performance?
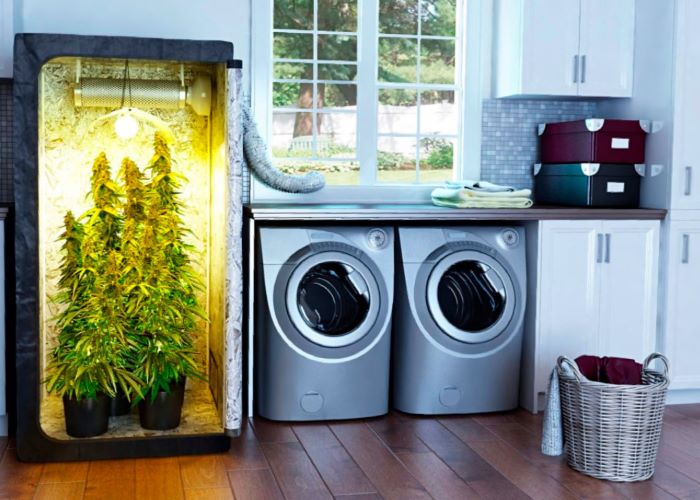
On average, in order to provide the cannabis with an adequate supply of fresh air, the air in the grow room needs to be fully exchanged approximately every 5 minutes, or 12 events per hour. To determine the required fan capacity, multiply the volume of your grow room by the frequency of complete air exchange. For example, let's take the growbox with the dimensions 2x1.5x1. Now we're talking about 3 m3. Multiplying 3 m3 by 12 gives us the required capacity of the duct (inline) fan – 36 m3 per hour. Taking into account the presence of the carbon filter and the associated power loss, increase this figure by 20%, which finally gives us the desired 43 m3 per hour. When using HPS lamps, numerous plants, and strong-smelling strains, you will need to install a more powerful fan than the one determined by standard calculations.
Odor Control
Growing cannabis indoors can be associated with an unpleasant situation where the long-awaited flowering fills the room with a distinctive aroma emanating from the flowering plants, which can compromise discretion and therefore safety. The installation of a carbon filter with an optional change of filling material is the most common and effective way to control odor. Its capacity and configuration depend on the duct (inline) fan model, the intensity of the odor, the size of your grow room, and numerous other factors. An improperly selected filter will not do the job, so be sure to pick this essential accessory responsibly.
Additional odor control measures may include using gels, incense sticks, and airing the room at night. It should be noted, however, that none of these techniques can guarantee the complete elimination of cannabis odor. Therefore, to maximize discretion, use reliable and proven odor control approaches.
Outdoor
Growing cannabis outdoors is the most natural and accessible way to utilize the resources of the environment to produce a high-quality and abundant harvest. However, it is not enough to simply put a seed in the ground and let things go, hoping for favorable weather within a few months. Preparing to grow cannabis outdoors is just as labor-intensive as the growing process itself, and requires a great deal of planning and attention to detail. Therefore, it is worthwhile to understand the intricacies of outdoor growing beforehand in order to provide your plants with the proper care and optimal conditions for healthy development.
The pros and cons of the great outdoors
Because of the specifics of this method of cannabis growing, both the strengths and some limitations of outdoor cultivation can be highlighted:
The pros include:
Minimal launching costs
Forget about expensive growboxes, growtents, DIY structures, or high energy bills. All you'll need are seeds, fertilizer, basic soil components, and perhaps netting or supports for branches in the later stages of maturity.
Utilization of natural resources
Sunlight and wind are your trusted allies in growing cannabis. Outdoors, they are totally free of charge and promote healthier plant development compared to indoor systems.
High yields
Outdoors, there are no space limitations, so you can let your plants run free with only the occasional pruning of particularly elongated branches. Some strains can grow up to 3.5 meters tall and produce up to 2-3 kilos (!) of buds, but in this case, pay close attention to the discretion of your grow spot.
Environmentally friendly process
In the open ground, cannabis becomes a natural part of the ecosystem to which it actually belongs, interacting with all the beneficial occurrences and unwanted encounters such as insects, birds, and soil microorganisms. Marijuana cultivation cannot be considered complete without this symbiosis, which is quite natural in outdoor growing conditions.
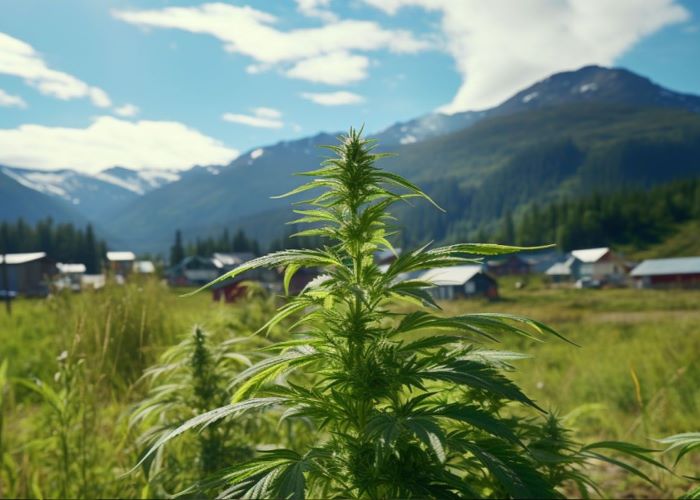
Unity and harmony with Nature
The care of plants and the observation of their development in their native habitat can be immensely beneficial in achieving harmony with oneself and the outside world.
Cons:
The dependence on weather conditions and the inability to control them
Outdoor plants are completely dependent on the weather, which can be variable and dangerous to cannabis. The most you can do is take precautions to protect the plants from fungal diseases and insects and to shelter the plants from inclement weather by moving the pots under a canopy during heavy rains. In all other cases, you can only hope for luck and stable genetics of the strain.
Limited duration of the favorable season
In most countries, the favorable period for cannabis cultivation lasts from 4 to 7 months, thus limiting the year-round growing season. Moreover, many regions are characterized by short summers, which complicate the cultivation of photoperiodic varieties, opening the way for autoflowering hybrids with the trait of intensive completion of the full cycle.
Vulnerability to diseases and pests
Grown outdoors, cannabis is more susceptible to pest infestations and the development of pathogens, especially if there is inadequate care or a lack of attention on the part of the grower.
Assurance of discretion and safety
It is important to organize proper discretion and safety to keep the site well-hidden with high fences, camouflage plants, or plant cannabis away from residential areas and popular hiking trails. Even in countries where growing is legal and the risk of prosecution is negligible, there is still the risk of unscrupulous people who enjoy the fruits of other people's labor and will want to steal your plants.
Careful selection of strain genetics
Each strain has unique environmental requirements, and not every strain is suitable for growing in a particular climate. It will take some extra time to research the specifications of the strain you want, but it will be well worth it.
What Are the Right Strains to Grow Outdoors?
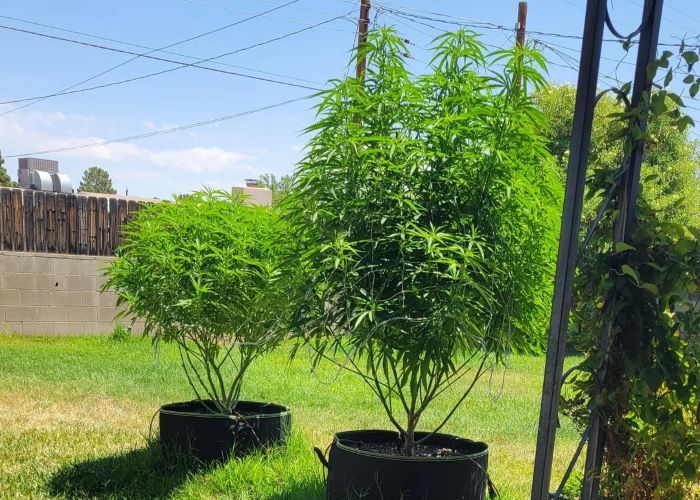
Despite the fact that the plethora of developed strains makes it possible to grow cannabis in almost any latitude, from Northern Europe to South America, this question has puzzled and will surely stump many novice growers who prefer the great outdoors to the controlled indoor environment. While growing plants under cover provides all the conditions for controlling the microclimate and adapting it to the needs of the chosen strain, growers who have decided to embrace the forces of nature do not have this privilege. In fact, the amount of potential yield outdoors can be greater than that indoors, but the demands on the genetics of such a strain are also much higher.
When choosing the right variety to grow outdoors, there are several key factors to consider:
The climate of your area
Weather is the first and foremost source of challenges when growing marijuana outdoors. Rough temperature fluctuations, steady rain, a hot dry summer, early frost... Consider each variable factor to pick the strains that can survive the weather changes. Focus on strain genetics. Sativa is better suited to high humidity and air temperature, while indica thrives in areas with cool climates and significant day/night temperature swings.
Duration of the vegetation season
Not every country has the privilege of warm weather for 9 months of the year. Many growers are content with only 10-12 weeks of summer when they can successfully grow and harvest the plant. If you live in such a region, consider planting feminized autoflowering and photoperiod fast-flowering strains.
The size of the adult plant
It is great if you have a summer house that stands in splendid solitude and is far away from the crowded area for many miles around. Most outdoor growers cultivate cannabis on a modest backyard plot, sharing a single fence with their neighbors. Consider where your plantation can be seen from, and once you have identified the slightest visual "leak," take action by planting odor-neutralizing herbs (datisca, artemisia, spiraea) near the cannabis plant. They will also provide additional protection from insects. You can also install an ornamental fence or use lush trees and shrubs as cover. At the same time, make sure the plants still receive at least 8-10 hours of direct sunlight per day. Apply training techniques, shaping the low profile of the plant. This will also increase yields and boost your skills.
The scent of buds during flowering
It is plain and simple here. Do not plant highly odorous (skunk) strains, preferring varieties with a more delicate scent.
Strain resistance to pests and diseases
You are much more likely to encounter unwelcome guests outdoors than in a sealed grow room, so choose a strain with a strong emphasis on natural and acquired immunity derived from stable and robust genetics.
Prime time for planting seedlings
Instead of wasting energy, money, and precious time, circumspect growers launch the season in March-April by germinating seeds and growing seedlings indoors, so that when they are planted outdoors, the young plants can quickly adapt to their new habitat. The optimal time to transplant seedlings outdoors is when the soil has warmed to 10 °C and night temperatures have stabilized in the 12-15 °C range. In most regions, this occurs in April-May, but we recommend that you focus on the local climate rather than calendar dates.
A few weeks prior to the planned planting date, the seedlings should be prepared for outdoor conditions. To do so, take the pots outdoors for 1-2 hours a day, gradually increasing the duration of their "outing". Closely monitor the condition of seedlings. If there are signs of stress (changes in foliage color or shape), reduce the intensity of hardening (acclimatization). Once the plants are accustomed to the weather conditions and can spend 24 hours in the open air without any consequences, stop watering them, and in one day you can safely plant the seedlings outdoors.
When moving seedlings outdoors, make sure that the threat of returning night frosts, which can be life-threatening to young plants, has passed. If possible, grow in pots or fabric grow bags. There are many advantages to this approach. Make sure that the planted cannabis is not overwatered due to the frequent rainfall typical of this time of year.
How to choose a grow spot?
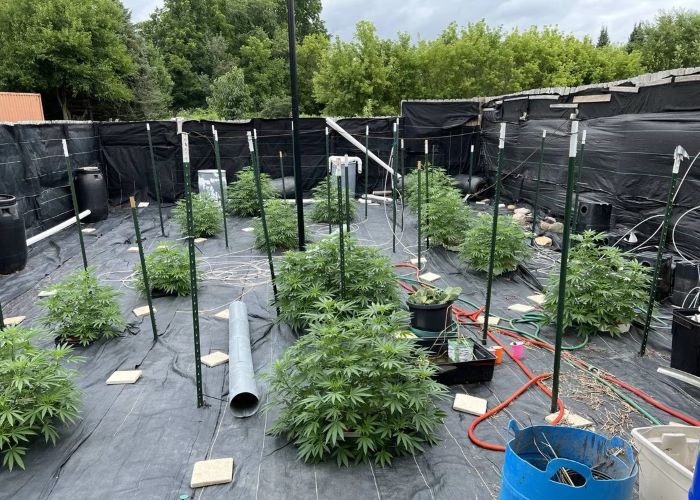
Choosing a suitable grow spot is not an easy task and requires special attention. Cannabis that is planted in the perfect location will reach its full yield potential, while plants whose owner has failed to thoroughly consider the grow spot will lag behind throughout the cycle. To get into the first company, consider the following factors when choosing a grow site:
Sun exposure
Cannabis should be exposed to sunlight for at least 8 hours a day, and for at least 10 hours when growing light-demanding sativa strains. Plant seedlings away from objects that cast dense shadows, keeping in mind the stealth aspect of your grow. It is preferable for your plants to receive daylight as early as possible – at sunrise. This gives the morning dew time to dry, reducing the risk of dewdrop sunburn on leaves due to the lens effect, as well as excessive moistening and the occurrence of fungal diseases. Take into account seasonal changes in the sun's position and use custom applications to calculate the sun's path across the sky throughout the season.
Light pollution
In areas with intense street lighting, make sure the plants are well covered from the light generated by streetlamps, which can interfere with the natural transition of the plants to the flowering stage.
The wind factors
Make sure the selected location is protected from strong gusts of wind. Use local terrain, natural green space, and obstacles such as trees, massive shrubs, or fences placed across the wind's direction to reduce its sometimes devastating impacts.
Discretion
Do not plant cannabis near fences where it can be easily seen from the street or neighbor's yard; supplement the area with camouflage plants and install decorative fencing.
Groundwater level
Elevated groundwater occurrence can lead to overwatering and rotting of the cannabis root system. If this feature is typical of your area, choose an upland location and provide adequate drainage in the planting pit. Grow the plant in pots or fabric grow bags.
Soil warming
For a variety of reasons, the ground may warm slowly in spring, delaying the point at which a seedling can be transplanted outdoors and shortening the duration of meaningful vegetation. In this case, plant your cannabis in raised beds, airpots or fabric smartpots, allowing for plant mobility during weather fluctuations.
Observance of crop rotation
The best forecrops to marijuana are garlic, winter wheat, and corn. Do not grow cannabis in areas where tobacco, tomatoes, bell peppers, or places where fungal or bacterial diseases have been found. The root system will not forgive you for such a blunder.
Many growers cultivate cannabis on a balcony or windowsill facing south or on a rooftop, which also somewhat falls under the definition of outdoor. In this event, it is recommended to grow compact, low-odor strains to reliably hide the plants from prying eyes and to exclude the possibility of third parties visiting the orchard.
How to prepare a seedbed?
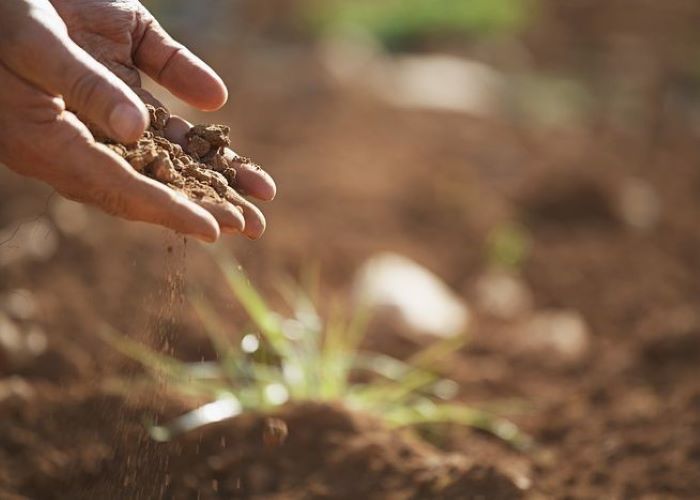
Once you have chosen the grow spot, it is necessary to properly prepare the plot for planting the seedlings, since a lot depends on the choice of soil and the preparation of the planting pit, so you cannot just ignore this stage.
Before you start preparing the pit, you must decide whether to use native soil or purchase a new one. Test your local soil for uniformity, toxins, pathogens, and chemical contaminants that can affect plant health and crop quality. Usually, growers do not use local soil, preferring to buy it and "tune" it at their reasonable discretion with various organic additives that provide nutrition, drainage, and neutrality.
Depending on the proportion of sand, earth, clay and silt, soils are classified as loamy, clayey, silty, loamy light sandy, and sandy. Loamy soil is considered the gold standard, as it meets all the criteria for an ideal substrate for cannabis cultivation. If the soil is dominated by silt or clay, add drainage components such as sand, vermiculite, perlite, or zeolite, and if the composition is sandy, enrich it with compost, peat, and other ingredients capable of retaining moisture and nutrients. On a case-by-case basis, disadvantages can be advantages; for example, sandy and loamy light sandy soils are great for handling excess moisture if your climate is too rainy.
When your soil is mixed and ready, perform a final analysis. Run water through it and measure the pH. Drained water should be in the range of 6.0-6.5.
It is preferable to prepare the seedbed during the first half of the day when the weather is warm and sunny. Set up the equipment you will need at this stage: a spade shovel, a rake, a container of prepared soil to fill the pit or components to add to the native soil, a bucket of water for irrigation, drainage components (expanded clay, zeolite), mycorrhizae or trichoderma, seedlings, and a pair of gardening gloves.
Once all the tools are at hand:
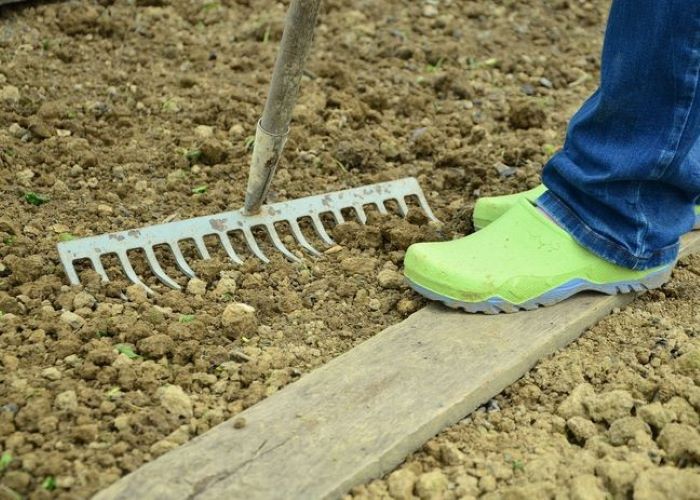
- clear the pit area of debris and weeds,
- dig a pit deep enough to fill it with purchased or prepared soil,
- slightly firm the walls and lay them out with coarse, previously buffered zeolite. This approach provides both drainage and additional moisture during dry periods, as well as protection from underground predatory insects such as mole crickets or grub worms that are always eager to eat the plant's roots,
- fill the pit with prepared soil with pre-added perlite, vermiculite, mycorrhizae, or trichoderma,
- slightly (!) compact the soil to eliminate air pockets and prevent subsequent subsidence,
- when filling the pit, occasionally put a plastic cup or pot with a seedling in it. When the surface of the pot or cup is level with the ground, leave it in the pit and backfill with the remaining soil,
- slightly compact the soil again,
- remove the cup or pot with the seedling,
- cover the walls of the hole you got with mycorrhizae,
- carefully remove the seedling from the pot and place it in a hole that is exactly the same size as the root ball,
- water the plant and spread a layer of organic mulch. The latter keeps the soil from drying out, eliminates unwanted weeds, limits insect access, and provides slow-release nutrients to seedlings.
- you can also add diatomaceous earth to your mulch,
- if you plan to grow more than one plant, place them at least 1 meter (3 feet) apart,
- make a preliminary survey of the sun's motion across the sky to avoid having some plants shade others.
The professionally prepared pit provides an excellent jump-start for young plants, ensuring a sustained supply of all the necessary components for their development into mature, healthy bushes that will reward you for your care with a bountiful harvest.
Keep in mind that outdoor cannabis cultivation is an exciting but labor-intensive activity, and your involvement does not end with just planting seedlings. You still need to make sure that your garden is constantly maintained and monitored for things like weather changes, pests and diseases, a lack of moisture and nutrients, and many other things that outdoor plants can encounter. No one is safe from failure, but the responsiveness of the plant, lots of patience, motivation, and persistence will be the driving forces that will move you day after day to achieve your cherished goal.
Maintenance and Care Peculiarities
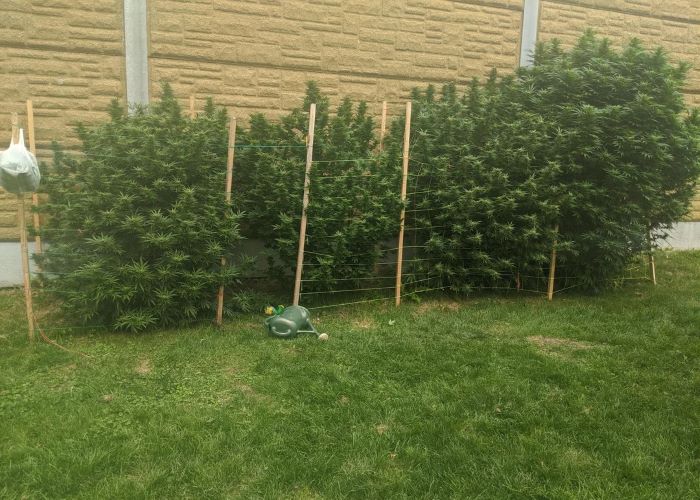
Growing cannabis outdoors differs from cultivation indoors due to various factors that cannot be controlled or manually adjusted. To protect your garden from potential hazards and yourself from the sad sight of dying plants, please follow these simple recommendations:
Monitoring for insects and diseases
"Guests", such as pests and pathogens, are much more likely to "visit and stay" outdoors. Any deviation from optimal conditions reduces the immunity of even the most resistant plants, opening the gates for unwanted visitors. Inspect your plants regularly and use natural insecticides and pesticides as a preventive measure. Welcome predatory but cannabis-friendly insects to your plot, and plant companion plants that repel pests.
Keep track of the weather forecast
Download a top-rated weather app and monitor it daily to avoid the hassles of unpredictable forces of nature. Sudden heavy rains, unbearable heat, gusty winds, and early frosts – all of these are extremely dangerous to cannabis, but if you take steps in advance, you can at least be prepared, if not able to avoid them. Grow cannabis in movable containers that make it easier to shelter the plants if the climate is unstable.
Adjust watering
Because of the constant changes in the natural factors that affect a plant's need for hydration, it's more difficult to know how often to water your plants when you're growing cannabis outdoors. Read the "Watering Schedule" section carefully and be guided by your input data. Water plants early in the morning or evening. If you do not have the opportunity to visit your plants regularly (e.g., in a guerrilla grow), mix the water-retaining granules or zeolite into the substrate at the time of planting. This will reduce watering frequency by 30-40%.
Pay special attention to size and structure control
When grown outdoors, cannabis tends to expand and elongate intensely, becoming almost unmanageable. Shape up a manageable bush profile with trainings and ScrOG nets. To prevent damage to the plant caused by the weight of the flowers at later stages of maturity, provide reliable support for branches, stems, and colas with side stakes, trellises, or tying.
Keep an eye on cannabis readiness for harvest
The timing of flowering may vary outdoors due to less consistent growing conditions. Watch closely for signs of cannabis maturity (the color of trichomes) so you don't miss the peak levels of terpenes and cannabinoids in the resin and ensure you have the highest quality crop.
Maintain safety and discretion
The cultivation of cannabis is still illegal in most countries, and a grower who does not take safety into consideration risks getting himself into trouble. Even where this issue has been resolved with legalization, there is always the risk of attracting unnecessary attention from those dedicated to fighting "drug" use and those who enjoy the fruits of other people's labor. Don't tell anyone (!) about your hobby; cultivate low-profile, low-odor strains and take action to keep your grow spot well hidden, or consider the option of a guerrilla grow. That's what comes next.
Guerrilla Growing
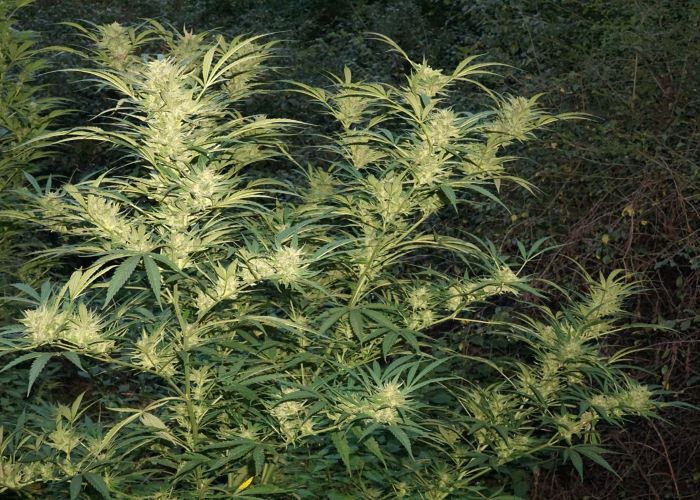
As the name implies, guerrilla growing involves cultivating marijuana in an inaccessible, remote location away from home, where only you know the way. Typically, enthusiasts choose a forest, abandoned field, or wild hills away from residential areas and roads. Basically, even though guerrilla growing has a fair community of fans, it comes with its own set of challenges to implement. It is important to research all the pros and cons of this type of cultivation in order to be successful in this type of cannabis cultivation.
Pros:
- Minimum costs.
- Safety and discretion.
- Simplicity.
The only investments required are seeds, substrate components, and fertilizers.
If performed properly, no one will ever know about your grow spot.
The opportunity to get a decent yield without the hassle and significant time commitment.
Cons:
- A lack of control over growing conditions.
- The risk of being uncovered.
- The importance of thorough preparation and planning.
Cannabis will have to fend for itself, as you may not be able to take quick action to protect your plants if the weather turns nasty.
Even in the most secluded and hidden places, your plantation may be found by people or animals, who will not fail to pick the ripening flowers or eat the fresh leaves.
Envision all potential challenges and develop a strategy to address them.
The perfect place for a guerrilla growing
Finding the right place for a stealth grow can be tricky, but if you succeed, you're halfway there. The plot should be remote enough from residential areas and crowded places, but not so far away that it takes you all day to get there. It is advisable that you reach this place on foot or by bicycle because you will have to visit your secret plantation more than once a season. Avoid locations near hiking trails and places where mushroom pickers are likely to be seen. Even if there is no visible trail, look for signs of human activity nearby, such as trash or the remains of a campfire.
While thoroughly concealed, the guerrilla grow spot should be open enough to receive direct sunlight. This may require a slight intervention on your part: clear the area of unnecessary weeds, clip spreading branches from neighboring trees, trim or remove shrubs, etc. Make sure that the landscape remains natural and hides the plantation securely. When you have cleared the area, remove any evidence of your presence or activity, including cut branches, trash, and debris. It is preferable to have a source of fresh water, such as a stream, lake, or river, near the proposed site, as this will greatly facilitate the aspect of watering the plants. You can even plant your cannabis as close to the water as possible so that the roots have access to underground moisture and need to be watered much less frequently. It is therefore important to ensure that the planting site is not exposed to flooding. The flood path can be determined after a detailed study of the area.
Safety precautions
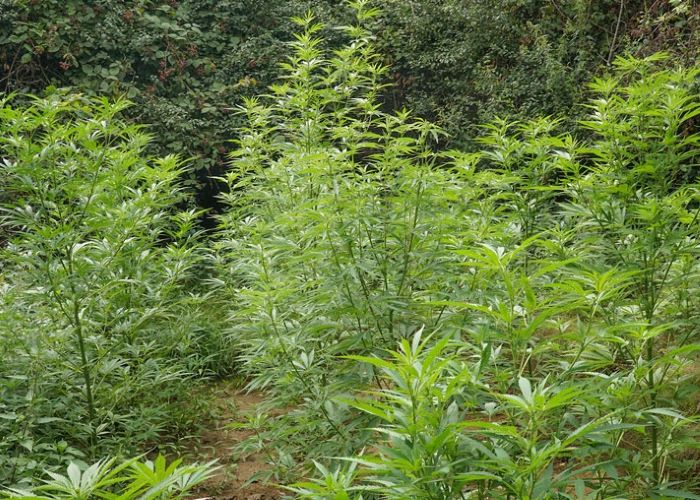
Growing cannabis under guerrilla conditions can be an exciting adventure that requires serious safety precautions:
Be discreet
Do not tell anyone (!) about your hobby.
Grow low-odor and sturdy strains
In the flowering stage, cannabis can spread its scent for dozens of feet, counterbalancing even the most professional discretion, while its resistance to external threats increases the chances of bringing what you've started to a successful harvest.
Thoroughly camouflage the grow spot
Surround your plants with natural barriers, such as thorny blackberry bushes or windfall debris. Remember that in autumn, the leaves on surrounding trees will yellow and fall, exposing your plants. Keep this in mind when choosing and arranging your planting location.
Leave no trace of your presence
Always find a new way to get to your grow spot, and leave no trace of your presence, whether it's distinctive work tools or shoe prints on wet ground. Do not smoke on site. Do not drop litter, even a small piece of paper. It can attract unwanted attention. Besides, it's not the best way to show gratitude to the place that hosted your cannabis.
Avoid group planting
The plants spaced far enough apart will attract less attention, and if one is found, the others are likely to remain untouched.
Become invisible
When visiting the plantation, wear casual clothing and have a strategy for dealing with the law. Be sure to have hiking gear with you, such as binoculars or a digital camera. If there is a water body nearby, fishing tackle can be a great distraction. Gardening tools, strapped to your bicycle, will help you mingle with the crowd of summerites and eliminate any possible suspicion. Take a look at yourself from an external perspective, then consider where you think this person might be headed, and make changes in your appearance and behavior if there is any doubt about your law-abiding character.
Stay on alert
If you notice a "tail", surveillance, or signs of suspicious activity on the plantation, leave the grow spot immediately and consider a change of location.
Pay special attention to the aspect of harvesting
Get to the plantation early in the morning. Do not stay there too long, and use a dense, airtight container for cut plants.
Feeding
Under natural conditions, plants get all the nutrients they need from the environment. Cannabis cultivated under the close supervision of a grower is entirely dependent on the amount and composition of fertilizer applied throughout the cycle. As with any aspect of growing, there are a myriad of scenarios, essential details, and rules that you must know and follow in order to have no doubts about how, when, and what to feed your plants. Let's take a look at everything in its due order.
Essential Nutrients and Their Contribution to Cannabis Development
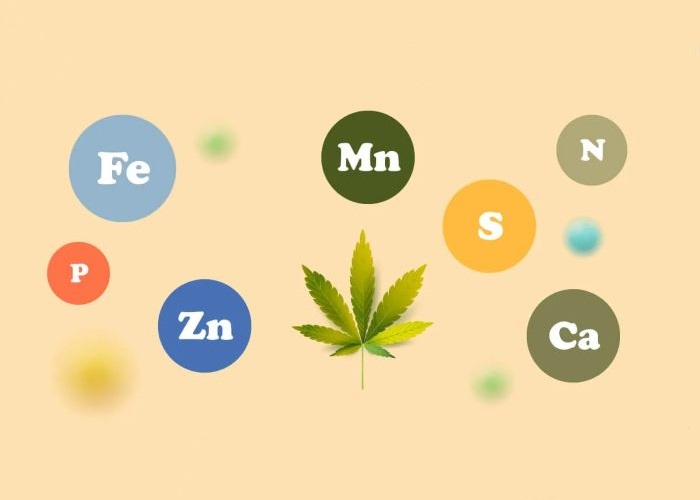
Three key macronutrients, referred to by the acronym NPK – nitrogen (N), phosphorus (P), and potassium (K) – are of vital importance in cannabis cultivation. The ratio of these elements in fertilizers is usually represented by numbers, for example, 10-5-7, which means the content of 10 parts of nitrogen, 5 parts of phosphorus, and 7 parts of potassium. Deficiency or excessive amounts of any element cause an imbalance that disrupts development and, in neglected cases, leads to irreparable consequences, including disease or the death of the plant. It is especially important to monitor the correspondence between the complex of fertilizers applied at a given stage of cannabis development and the general condition of the plant in order to react in time to the "distress signal" and correct the allowed mistake.
Nitrogen plays a key role during the vegetative stage, when the plant actively builds up its green mass. Nitrogen maintains photosynthesis and metabolism, strengthens immunity, and ensures proper energy distribution in the plant. Stunted development, depleted condition, feebleness, and reduced leaf size are observed with nitrogen deficiency. The excessive amount of nitrogen causes thickening of the stems, leaves become dense and soft; and the plant stunts its development.
Phosphorus is required during the seedling and flowering stages, but is also essential in limited amounts during the vegetative stage. Its function is to form a strong root system, dense and resinous flowers, and to transport nutrients within the plant. Phosphorus deficiency results in uneven and stunted growth, purple or gray coloring of leaves with partial tissue necrosis. Excess phosphorus can block the absorption of other micronutrients and slow metabolism.
Potassium determines the plant's immunity and endurance, as well as structural stability and terpenes production. Potassium should be available in adequate amounts throughout the cycle. The main sign of potassium deficiency is "burnt" leaf tips, always accompanied by yellowing. Taken separately, these symptoms may indicate other problems such as heavy fertilization, light burns, or iron deficiency, as well as a reaction to stress caused by transplantation. Excess potassium leads to metabolic disorders and stunted development.
Cannabis also requires secondary macronutrients throughout its life cycle. These include calcium (Ca), magnesium (Mg), and sulfur (S), traditionally used in combination with NPK, as well as micronutrients such as manganese (Mn), silicon (Si), molybdenum (Mo), boron (B), copper (Cu), iron (Fe), chlorine (Cl), and zinc (Zn). While nutrient-rich organic soils and irrigation water may contain some of these elements, they are usually not enough to meet the needs of the cannabis plant. This is where supplemental fertilizer comes into play. You can either buy ready-made complex or mono fertilizers in the store or make them yourself.
Organic and Mineral Fertilizers
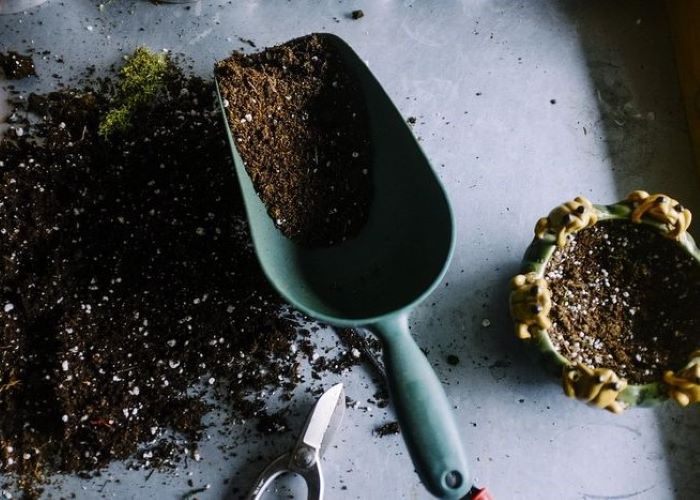
There are two types of fertilizers used in cannabis growing: organic and mineral fertilizers. The choice of one or the other depends on various factors such as the growing environment, the experience of the grower, the needs of the plant, etc.
Organic fertilizers are made from natural components such as compost, organic worm castings, guano, manure, bone meal, fermented plant juice (FPJ), seaweed, etc. In terms of nutrient content, they are not inferior to mineral elements, and in the case of a high-quality product prepared by your hands, they can even outperform them. There are many benefits to the use of organic fertilizers, and here are some of the most important ones:
A rich and diverse array of nutrients
Organic fertilizers contain a full range of micro- and macronutrients necessary for the healthy development of the cannabis plant, contributing to its harmonious growth, increasing its immunity and stress resistance.
A healthy soil ecosystem
Competent use of organic fertilizers promotes the active life of beneficial microorganisms, improves soil structure, creates a favorable and natural biosphere symbiosis, and prevents the development of pathogens in the root zone.
Long-term effect
Organics cannot build up (deposit) in the substrate, plant tissues, and buds in the form of salts, eliminating the need for growers to flush cannabis prior to harvest and virtually reducing the risk of overfeeding. Meanwhile, the process of integrating fertilizer components introduced into the soil takes place slowly, contributing to the full absorption of nutrients and reducing the frequency of fertilizer applications.
Improved flavor and aroma
Organic fertilizers unlock the production and quality potential of terpenes, significantly improving the organoleptic properties of the final product.
The option of making your own fertilizer
Many components of organic fertilizers are available in everyday life and can be used to make your own fertilizer. They have no impact on the environment, and are part of nature's cycle of nutrients.
While the list of benefits is quite extensive, there are also disadvantages to organic fertilizers that can make it difficult to use them effectively.
Sustained release of nutrients
Soil microorganisms require time to break down fertilizers into a form accessible to cannabis plants, making the use of organic fertilizers inappropriate for acute nutrient deficiencies. In addition, as the temperature drops, the integration of nutrients into the soil slows down, complicating the organic cultivation of cannabis in cooler latitudes.
More complex compounding and application of fertilizers
On average, it takes about a year to compost waste, and transporting organic components from the nearest farm can be quite labor-intensive.
Nutrient complex heterogeneity
Each new application of organic fertilizer may contain a different ratio of nutrients, making it somewhat difficult to control the balance of nutrients.
High cost of components
Growing costs increase significantly if you do not have your own sources of fertilizer.
Mineral fertilizers contain chemically synthesized nutrients in a form available for rapid uptake by the plant. They are available in the form of complex fertilizers containing NPK in different proportions for a particular stage of growth, as well as mono-fertilizers designed to compensate for deficiencies of certain elements. In addition to NPK, complex mineral fertilizers contain a number of secondary macro- and micronutrients to ensure proper cannabis nutrition. Regardless of its artificial origin, there are many fans of this type of fertilizer who are guided by the following factors:
Accessibility and affordability
Mineral fertilizers are available and affordable. They are often less expensive than their organic analogs, resulting in lower overall production costs.
A convenient form for application
Mineral fertilizers are available in a convenient format of concentrated liquids, granules, or powders, making them easy to store, simple to prepare nutrient solutions, and time-efficient.
Control of the nutrient concentration
Using the nutrient content information provided on the package, growers can measure the exact amount of fertilizer and dilute it with water to the required concentration.
Nutrient availability
Mineral nutrients are immediately absorbed by the cannabis root system upon application. This is what makes this type of fertilizer so invaluable for the quick replenishment of deficiencies.
While there are many solid arguments in favor of the use of mineral fertilizers, there are also challenges associated with their use:
A tendency to build-up
Unused nutrients tend to accumulate in the substrate in the form of salts, causing an acidity imbalance and preventing complete nutrient uptake (blockage) by cannabis roots.
Degradation of the soil ecosystem
Mineral fertilizers destroy the soil structure and reduce its fertility by replacing beneficial microorganisms and creating their own artificial world.
Higher risk of exceeding dosages
The rate of nutrient uptake can play tricks on you if you exceed the recommended amount of fertilizer. Moreover, mineral fertilizers should be applied more frequently than organic ones, which, in the case of inexperienced growers, often lead to overfeeding and chemical burn of plants. Always check the pH and ppm of drainage water!
The need for flushing
Built-up salts and minerals, if not removed from the growing medium and cannabis tissues in time, will degrade the organoleptic qualities of the final product, giving it a "chemical" flavor and aroma.
Combining organic and mineral fertilizers at different stages of cannabis development or depending on specific circumstances may be the way to go. This versatility ensures that the benefits of each type of fertilizer are maximized while reducing the appearance of their drawbacks.
Organic Growing
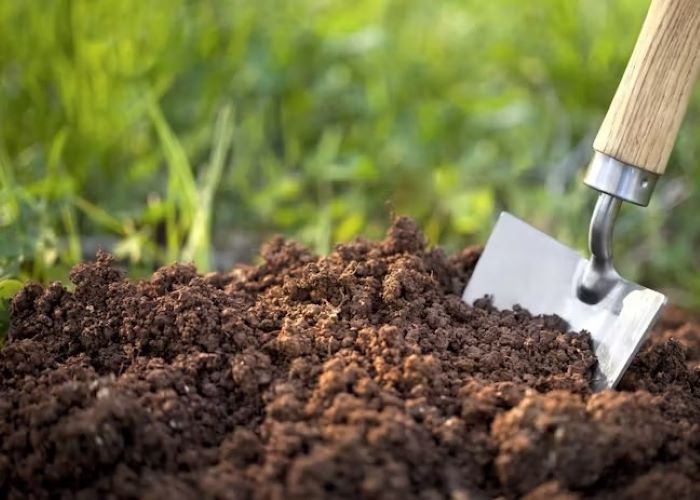
Today, organic gardening is no longer the hobby of dedicated enthusiasts but has gained popularity even among experienced growers. "Don’t Panic, it’s Organic!". This saying aptly describes the approach that is highly appreciated for the use of purely natural components and natural processes to obtain high-quality crops without "chemistry", implementing the idea of Mother Nature and fully in line with the philosophy of harmonious interaction between humans and the world around them. As you study the complex interaction between soil microorganisms and the intensity of the cannabinoid profile while kneading compost tea, your skill curve will steadily rise. It seems like the perfect way to grow! However, it is not as simple as it seems at first glance. Organic gardening has certain peculiarities in practical application, where it is desirable to have a preliminary understanding in order not to face unsolvable problems later. So, before you rush out in a flurry of eco-friendly activity, filling your garden beds with compost and getting rid of bottles and cans of mineral fertilizer, take a deep breath and read this chapter carefully.
Advantages of organic growing
Following tradition, let's start with the benefits of this approach:
Quality
One of the main reasons given for growing cannabis organically is the high quality of the final product. Flowers grown with organics are recognized by the prominent profile of cannabinoids and terpenes that underpin excellent organoleptic characteristics as well as powerful and pronounced effects.
Ecological sustainability
Organic cultivation reduces the burden on the environment, preserves soil and water resources without contaminating them with synthetic chemicals, and creates closed ecosystems that support natural biodiversity.
No health risks
Organically grown cannabis is free of synthetic residues and pesticides, which is of critical importance in the cultivation of medical strains.
A solid start for novice growers
Despite the complexity of the method, many aspects of organic growing have been successfully used by beginners for their first grow. Natural processes in organic soil create an environment that is more forgiving of amateur mistakes than hydroponic or aeroponic systems, which require careful tuning and relentless monitoring.
Stable genetics
Organic cultivation contributes to the preservation of stable genetics in cannabis, minimizing the risk of strain degeneration with each subsequent cycle.
The educational and spiritual aspects of the process. Comprehensive implementation of this method will require more than an hour spent on tutorials, but once you figure it out, your world will turn upside down. A more nuanced understanding of the interrelationship of different organisms and the processes between them leads to a harmonious perception of the issues of creation and sustainable mental health.
Disadvantages of organic cultivation:
A lack of full control
Organic growing, to a greater extent, depends on natural factors and processes that are not subject to manual control, which introduces an element of unpredictability into the process. Without solid experience in this area, it can be difficult to adjust medium levels and fertilizer application rates, potentially affecting the length of the growing season and the amount of the final yield.
Relatively high costs
Organic fertilizers, substrate components, and natural fungicides or pesticides are on average more expensive than their synthetic analogues.
Extended maturation period
The nutrients in organic fertilizers are released into the soil gradually, which may slightly slow the pace of the full cycle.
Despite the inherent challenges of organic growing, most devotees prioritize the undeniable benefits of this method in producing breathtakingly airy, fragrant, and incredibly resinous buds. It's all about motivation and hard work focused on reaching your goal!
Ways of implementing organic cultivation
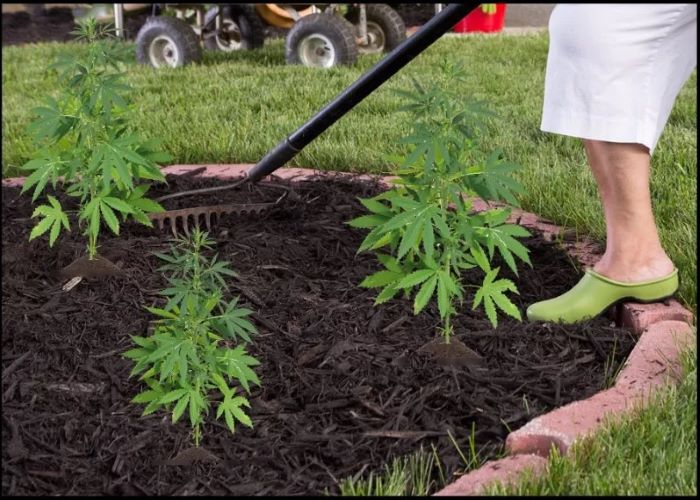
Let's move from theory to practice. By mastering the basic concepts, you will not only create the perfect environment for the plant to thrive, but also deepen your overall understanding of the fundamentals of cannabis cultivation.
Provide a healthy soil structure
The cornerstone of organic growing is a healthy and vibrant soil that is rich in microorganisms. Avoid using synthetic products that can kill beneficial bacteria and fungi, thereby damaging soil structure. When planting seedlings in nutrient-rich soil, remember to periodically add compost and other natural ingredients to ensure the biodiversity of your substrate.
Mulch it up!
Mulching retains moisture, suppresses the growth of undesirable weeds, and maintains biological activity in the soil while providing a long-lasting source of nutrients for cannabis.
Use only organic fertilizers and formulations. If possible, make your own fertilizers, as well as pest and disease control products, from natural components. Then you can be sure of the correct nutrient ratio, high quality, and safety of the applied product.
Create a sustainable ecosystem
Attract beneficial predatory insects and grow companion plants like mugwort, mint, or basil next to cannabis. This not only helps disguise the smell of the plants, but also attracts cannabis-friendly insects that naturally keep pests activity under control.
Adjust discrepancies in indications
There are a range of organic products available to maintain an optimal pH level in the soil. Thus, if the alkalinity is high, use acid peat, pine chips, and acetic acid, and if the acidity is high, use ash, dolomite powder, or decomposed manure. Please note that some of these substances can be quite aggressive in their structure, so use them cautiously and carefully measure the pH of the soil and the applied solution with special metering devices.
Constant monitoring and maintenance of a grow report
Keeping track of the plant's responses to the techniques applied will not only help you customize and tailor your approach to the plant's development, but it will also help you monitor the dynamics and promptly address a problem long before the critical moment arrives.
As you can see, growing cannabis organically requires no sacred wisdom or secret scholarship and is available to anyone who is motivated and dedicated. As you can see, growing cannabis organically requires no sacred wisdom or secret scholarship and is available to anyone who is motivated and dedicated. However, what is at stake is nothing less than getting to the point of harvest and achieving high-quality buds. By practicing organic cultivation, over time you will acquire the skills that will take you to the level of developing your own techniques for interacting with cannabis and achieving the highest quantitative and qualitative results.
Nutrient Application Schedule
If growing cannabis is an art, then creating a nutrient application schedule is a scientific approach that takes time and expertise to master. Manufacturers of commercial mineral fertilizers typically provide detailed instructions on how to use their product. However, a mindful approach to this aspect of growing allows you to tailor instruction to your specific conditions and limit experimentation with your plants. To do so, it is necessary not only to follow the above recommendations and adjust them wisely, but also to study the needs of cannabis at each stage of development and monitor the plant's reactions to the application of fertilizers, taking into account their concentration, amount, and balance of nutrients.
How to apply fertilizers?
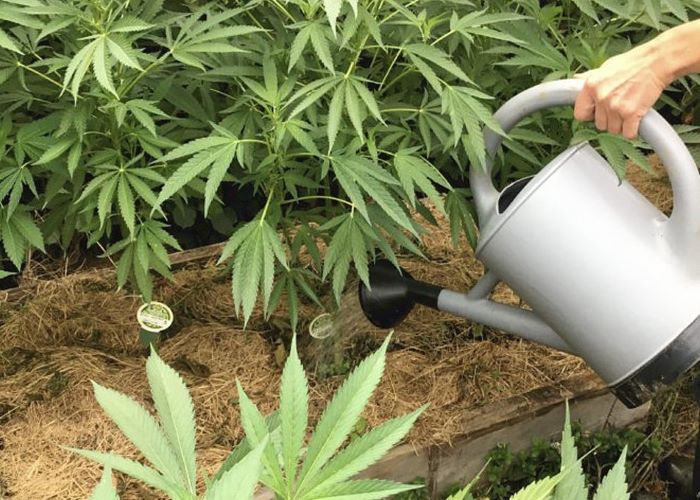
The information below applies to growing cannabis in soil, inert substrate, hydroponic, or aeroponic systems. Growing plants in supersoil does not require the application of additional fertilizers because the nutritious substrate contains all the necessary elements in optimal amounts.
Foliar feeding can be an effective solution if your plants show symptoms of deficiency in any of the nutrients. This method provides immediate delivery of nutrients to the cannabis tissue, eliminating the risk of overfeeding and blockage.
Draw up a table (a chart) in advance to record your fertilizer application rates, nutrient ratios, and concentrations, as well as the overall appearance of the plant. In this way, you can visually monitor the effect of the fertilizer on the condition of the plant and adjust its composition and saturation if necessary. Fertilizer should be applied strictly on schedule, with equal time intervals between applications. In addition to the nutrient balance, it is also important to monitor the pH and ppm (EC) of the irrigation water and/or nutrient solution. Maintaining the optimal range of indicators ensures full absorption of nutrients and eliminates the risk of nutrient blockage.
Sprouts and seedlings do not need fertilizer. During the first 3-4 weeks of their life, the plants are nourished by the energy given to them by nature itself.
After 3-4 pairs of true leaves (2-3 floors) have emerged, cannabis enters the vegetative stage, with nitrogen as the main "building" element. Apply fertilizer at a 2-1-2 or 4-2-3 NPK rate for the first two weeks. Switch to a 3-1-1 or 10-5-7 ratio as your plants begin to increase in vegetative mass. As the cannabis plant approaches flowering, gradually level out the nitrogen, phosphorus, and potassium ratios to equal proportions to slowly prepare the plant for the transition to the new stage of the cycle.
The vegetative growth continues during the first few weeks of flowering. More and more flowers are still being formed, so it is not recommended to significantly reduce the application of nitrogen. The most common options for NPK ratios at this stage are 4-8-7 or 5-10-7.
During the active flowering stage, phosphorus, and potassium become the main priorities, while nitrogen takes a back seat. Throughout this period, the optimum NPK ratio would be 6-15-10, and 1-2 weeks before the intended flushing or harvest – 4-10-7.
Boosters
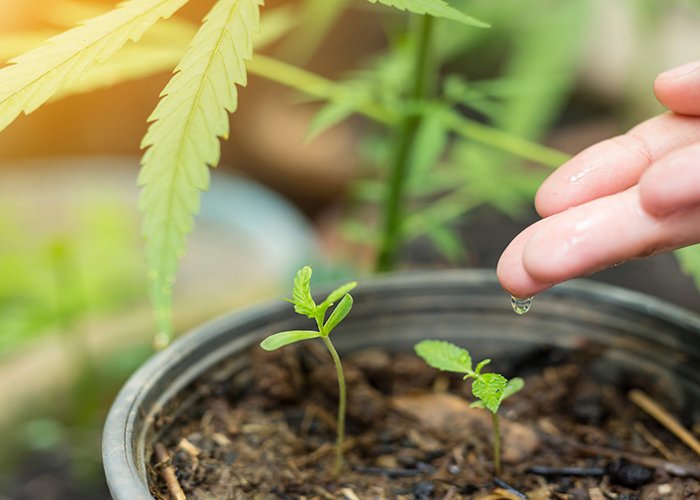
Boosters, or flowering stimulants, are highly targeted inorganic fertilizers used to increase cannabis yields and enhance the organoleptic properties of buds. They contain high concentrations of all the nutrients, vitamins, amino acids, and other substances that activate the metabolic processes of plants during the flowering stage, resulting in larger, higher-quality buds.
The use of boosters has become widespread in recent years, not least due to the clever marketing strategies of fertilizer manufacturers. Meanwhile, they actually show high efficiency in terms of increasing yields, which has been proven by independent research and cannabis cultivation practices. The main point in favor of boosters is their affordability and ease of use. As a ready-to-use product, boosters eliminate the need for growers to painstakingly study the composition and combination of fertilizers, as everything needed for a full-blown cannabis blossom is now available "under one lid". All that is required is to accurately measure the right amount of the formulation, mix it with water, check the pH/ppm and the miracle solution is ready. In addition, boosters speed up the flowering process, which can be useful in the cultivation of strains with longer maturation periods.
However, despite the obvious benefits, there are risks and challenges to using boosters, especially for novice growers. These are some of them. If not handled properly or if pH and ppm are not adequately checked, high doses of nutrients can cause root burn. At best, this can lead to reduced yields and poor flower quality, and at worst, the plant may die in the final stage of growth. Even when properly applied, the chemical nature of boosters degrades the organic soil microbiome and drastically reduces the diversity of the environment to which cannabis has been accustomed throughout its life cycle. As with mineral fertilizers, the application of stimulants forces the grower to perform a flushing of the cannabis root system to remove accumulated salts and chemicals prior to harvest. High-quality boosters can be expensive.
Based on the foregoing, the use of boosters is not a mandatory condition, but an optional choice for advanced growers who seek to optimize the process and are willing to carefully and precisely control all the parameters of cultivation. As many years of practice have shown, it is quite possible to achieve excellent results without the use of any flowering stimulants or other natural products such as fermented plant juice (Korean Natural Farming, KNF) and compost tea.
Ultimately, the decision to apply boosters should depend on your goals, skills, and willingness to maintain the necessary conditions and closely monitor the growing process. It is important to remember that the overall success of the endeavor depends not only on the additives used, but also on the competent utilization of the knowledge gained, the effort invested, and meticulous attention to detail.
Watering
The significance of water in the life of cannabis cannot be overestimated. This life-giving element is critical to all aspects of the plant's life cycle, from photosynthesis to maintaining cell structure. A well-managed watering schedule promotes proper plant development and helps avoid most potential problems, which is one of the key factors in achieving a quality crop.
Mastering the art of correct watering is the duty of every grower. The needs of plants are constantly changing throughout the cycle, requiring a personalized approach to the optimal watering schedule. This chapter explains how to avoid common mistakes and reviews key aspects of this process.
Watering Schedule
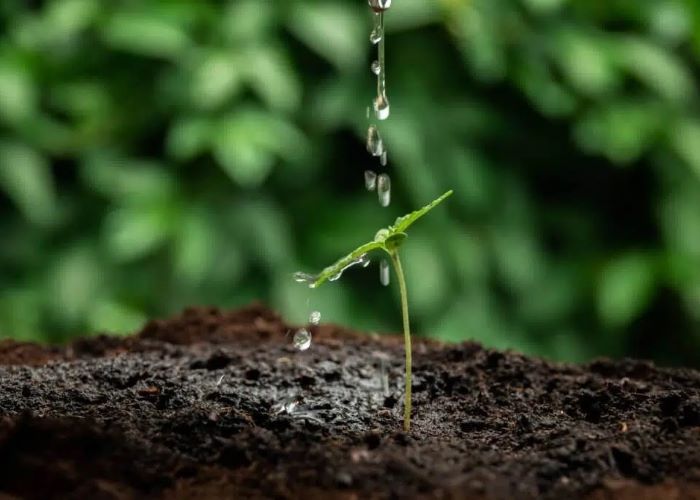
At first glance, watering cannabis seems a simple task. However, beginners often struggle with this routine, either overwatering or overdrying their plants, sometimes causing irreparable damage. The common method of weighing the pot does not always work, as you need to go through more than one successful growing cycle to learn how to determine a plant's needs just by the weight of a container. At the same time, there is no universal algorithm that determines the frequency and amount of watering, as it is influenced by a variety of individual factors:
Climate conditions
Grown outdoors, cannabis is subject to temperature and humidity extremes throughout the day, as well as the effects of changing weather and seasons. These factors significantly alter water consumption and require the responsible grower to constantly monitor the plants' health.
Growing medium
Properly conditioned soil will hold exactly the amount of moisture the cannabis requires until the next watering (ideally after 3-5 days) without the risk of root rot. However, given the variety of substrates used for cannabis cultivation, this is not always achievable on a practical scale and must be balanced by the frequency and amount of water introduced. Also, make sure the soil is well-drained, and the container has enough holes to drain excess moisture.
Stage of development
Young seedlings and adult plants have significantly different needs due to the different amounts of water required for life processes. To prevent overwatering and damage to the delicate root system of the young plant, spray it periodically instead of watering heavily when the top layer of the substrate dries out.
The volume of the container and the material it is made of
As the plants mature, you will need to transplant them into larger containers. The larger the container, the less water the plant will need because the soil in the container will dry out at a slower rate. The material the container is made of also plays an important role in developing the watering schedule. Pots made of clay or geotextile promote faster evaporation of moisture compared to plastic pots, which hold moisture longer.
The condition of plants
Plants affected by pests, disease, or stress (including training techniques) require an adapted approach to watering.
How to water cannabis?
The first and foremost tip to remember when watering is not to overwater the plant. Cannabis tolerates a lack of water much better than an excess of water, particularly if overwatering becomes systematic. To determine if your plants need water, insert your finger about 4-5 cm into the soil. If the soil is completely dry at this depth, then it's time to water the plant.
Use clean, room-temperature (21-23 °C), pH-stabilized water in an amount equivalent to 15-20% of the total substrate volume in a single watering application. Just go slow and water the plant "from the center", gradually moving to the edge of the pot. When using large containers, leave the outer edge of the substrate dry. Avoid standing water on the surface of the soil, and make sure the drainage does not stagnate in the drip tray. If the water drains slowly from the container, you have more than 4-5 days between watering sessions, and the plants show signs of overwatering, add perlite or vermiculite to the substrate to increase the moisture-draining properties of the soil.
Pay close attention to the overall appearance of the plants. If there is a lack of water, the leaves become stiff and droopy, the lower leaves turn yellow, and the overall development of the plant stunts. Overwatering is characterized by thickening and darkening of the leaf plate (lamina), depressed state of the plant, an unpleasant odor of the substrate, and the formation of mold on its surface. Keep in mind, however, that the symptoms listed above may indicate problems such as nutrient deficiencies or the development of a disease. Only continuous monitoring and timely response to plant alarms, taking into account all of the above recommendations, can bring clarity to the situation.
Control of pH and ppm
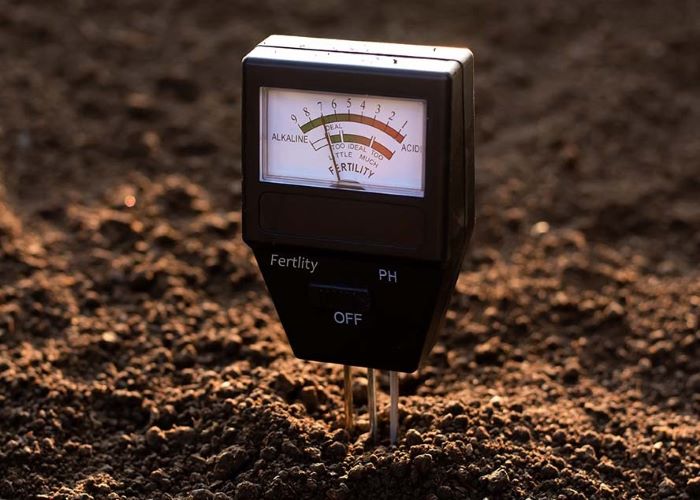
The acidity (pH) and total dissolved solids (ppm) per liter of water should be closely monitored when watering cannabis. It is worth noting that monitoring these indicators is not an optional task. It is a mandatory aspect of successful growing. Maintaining the optimal range will provide your plants with the perfect growing conditions, resulting in larger, healthier, and more productive plants.
Growing cannabis in nutrient-rich soil with organic fertilizers reduces, but does not eliminate, the need for impeccable control of water parameters. Perform regular measurements and record them in an observation chart to see how your approach to watering and feeding affects the medium and overall health of the plant. Make adjustments as required, and monitor continuously so you don't miss that first "emergency call".
The pH level
Cannabis efficiently absorbs beneficial substances when the acidity of the nutrient medium is strictly maintained. The optimum pH level for cultivation in soil is 6.0-6.5. Growing in hydroponic and aeroponic systems, as well as in inert substrates, requires values in the range of 5.5-6.0. This difference is determined by the fact that the substrate is a kind of buffer between the roots and the nutrient solution, but its resources are not unlimited. The use of mineral fertilizers can lead to the accumulation of chemical substances in the soil, disturbing its acid-base balance (ABB) and blocking the proper uptake of nutrients by the plant's roots.
Each water application begins by measuring the acidity of the irrigation water source. If your tap water, when measured, is quite suitable for watering, then congratulations, you are one of the lucky ones. Most growers collect rainwater, look for natural springs, or purchase purified drinking water. The latter, by the way, is also a matter of constant monitoring. Knowing the exact pH value, you can always adjust it in the right direction by using acidizing or alkalizing solutions (pH-down, pH-up). It should be noted that fertilizers and components used in substrate preparation can also affect pH, and these effects are often cumulative in nature. In addition to monitoring the pH of the nutrient solution, the pH of the drainage runoff and the difference between the two should also be monitored. In this way, you will be able to understand the processes taking place in the pot and react to them in time by skipping feedings or, on the contrary, increasing the portion.
At first glance, this task may seem challenging, especially for a beginner. However, with time and practice, you will learn how to maintain stable conditions for full nutrient uptake by your plants.
The ppm (EC) level
The ppm (parts per million) level indicates the total amount of dissolved minerals and solid particles in the water used for irrigation. This is an important parameter that should be constantly monitored as the ppm requirements of cannabis change at different stages of the life cycle.
Electrical conductivity (EC) reflects how well dissolved substances conduct electricity. The higher the EC, the greater the nutritional value of the solution. Remember that purchased fertilizers contain a high concentration of solid particles, so be careful, and add them in precisely measured amounts. In the early stages of plant development, the optimum ppm level may be 500-600. With the approach of the pre-flowering stage, it is recommended to increase this indicator to 800-900, and with the transition of the plants to the flowering stage, the optimal level of ppm will be between 1000 and 1100.
Use a TDS (conductivity) meter to measure ppm. It is also helpful when flushing the plant's root system if you are using mineral fertilizers and boosters. After calibrating the device, measure the ppm level in the water used for irrigation and for preparing the nutrient solution. If it is too hard (solid particles exceeding 300 ppm), consider using a filter or reverse osmosis (RO) system to purify it. On the other hand, water that is too soft (solid particles below 100 ppm) can have low levels of calcium and magnesium. This scenario requires adding these elements in the form of specialized fertilizers like CalMag.
Pests and Diseases
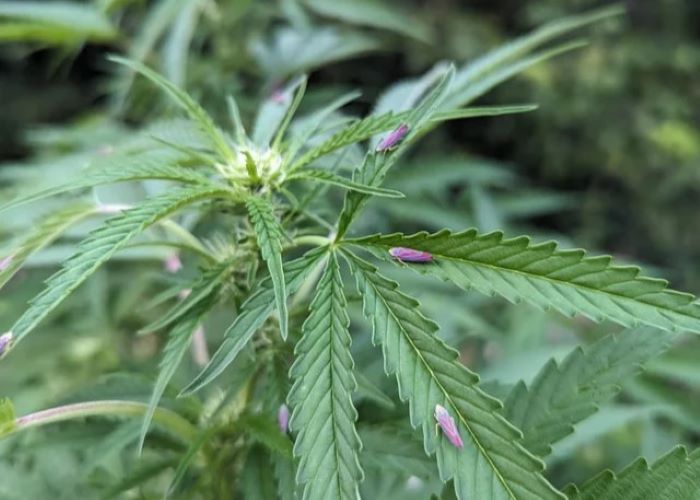
One of the most frustrating challenges you can face on your path to a long-awaited harvest is the appearance of various pests and diseases. These unwelcome guests can interfere with any stage of cannabis development, thereby jeopardizing your peace of mind, your mood, and the positive outcome of your affair. It is the duty of a responsible grower to inspect plants thoroughly on a daily basis to ensure that problems are detected at the earliest possible moment. This is the time when it is much easier and cheaper to address the issue. However, even in this case, some effort will be required. The primary goal of the passionate botanist is not only to identify the source of a concern and address it promptly, but also to prevent potential complications through long-term planning. Just follow a few simple rules:
Choose the right genetics that are suited to your climate
Each strain is characterized by its own set of optimal requirements for growing conditions, where its immunity to diseases and pests is best tailored. By neglecting this basic requirement, established by nature and fine-tuned by diligent breeders, you risk ending up with stunted, diseased plants and, ultimately, a wasted cycle.
Keep an eye on growing conditions
Maintaining an optimal microclimate tailored to each stage of development, keeping the light regime in check, and providing adequate air exchange and ventilation in the growbox are the minimum requirements for a successful indoor grow.
Stick to your watering and fertilizing schedule. Water your plants according to their needs and use a balanced fertilizer with a mix of nutrients.
Use training techniques to improve air exchange within the plant structure
Low-Stress Training (LST) and timely defoliation promote better airflow and light penetration into the plant structure, reducing the risk of disease development and pest infestation.
Cleanliness is next to godliness
Always wear clean clothes, use gloves and sterile tools, and keep your work area clean and tidy at all times. A clean, sealed, and relatively closed space prevents insects from entering and spreading infectious and viral diseases.
Monitoring and prevention
Routine preventive treatment with neem oil or aloe juice will deter most pests, while daily monitoring of the plants' condition will help identify and address the problem promptly.
Pests
However, if you find that your plant is being attacked by insects despite the measures you have taken, don't panic. Quarantine infested plants immediately and treat healthy plants preventively. This approach is more likely to limit the spread of insects to other plants. Identify the enemy and take all possible measures to eliminate it.
Combating Methods
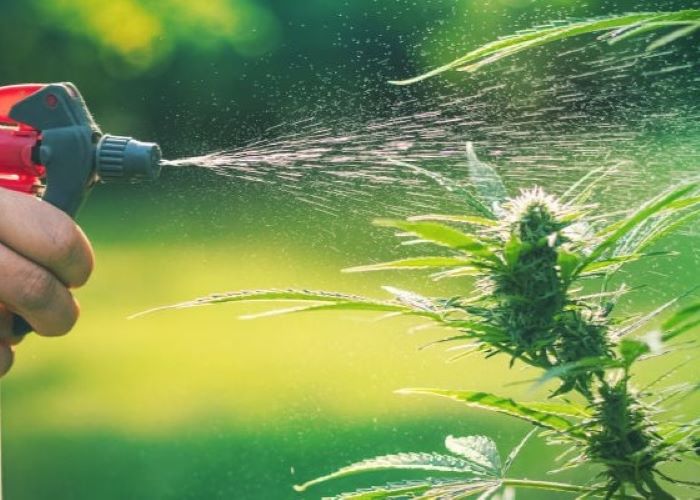
Use organic means of insect control rather than synthetic ones in the early stages of an infestation. You can find a variety of ready-to-use products with this spectrum of action in the specialized shops, but you can also make an organic insecticide yourself. The most common, widely used, and effective organic treatments are:
Neem oil
It is an effective treatment for most cannabis pests, including powdery mildew, root rot, and fungus. For preventive purposes, mix the neem oil with water at a concentration of 1:10. Water the cannabis or spray the leaves on both sides every 7-14 days. In cases of widespread infestation by adult species or their larvae, treat infected plants every 3-4 days. It is not recommended to use neem oil during the flowering stage as it has a heavy odor that can affect the flavor and aroma of buds.
Insecticidal soap
A powerful, broad-spectrum organic insecticide often used in combination with neem oil. The spray material contains 2½ tablespoons of pure liquid soap (without fragrance or artificial colors), 2½ tablespoons of vegetable oil, and 4 liters of water. It is not used as a prophylactic agent.
Diatomaceous earth
A mechanical insecticide that causes damage to the chitinous covering of insects, resulting in their immobilization and death. Prepare an aqueous solution with diatomaceous earth at a concentration of 1:5 and spray the plants 1-2 times a week until the insects disappear, or apply it to the soil around the stem of the plant.
Aloe vera
An excellent preventive treatment against pests, diseases, and fungal pathogens, as well as a rich source of micronutrients and beneficial substances. Dilute 1 teaspoon of aloe juice in 1 liter of water and spray the leaves from both sides once a week until the beginning of the flowering stage.
If your plant has been attacked by insects during the flowering stage, avoid applying products to the buds, as even organic solutions can negatively affect the flavor of the final product. Indoor plants are treated before lights out by lowering the air temperature to nighttime levels, while outdoor plants are treated early in the morning before the sun rises. Pay special attention to the undersides of leaves and internodal axils. Many pests prefer to nest there.
Common Pests
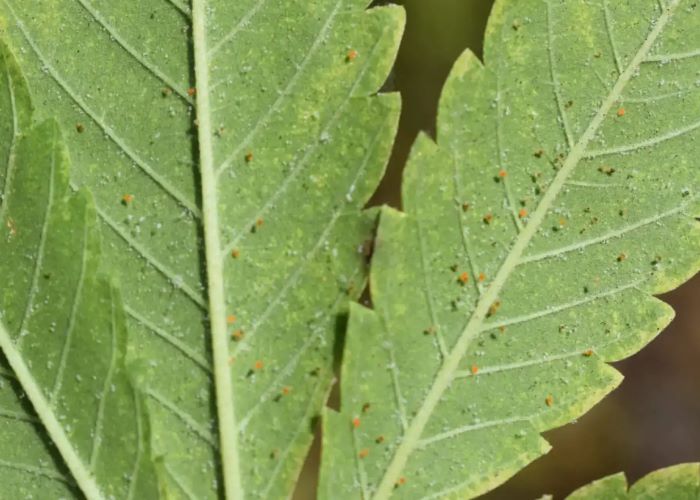
Spider mites
A tiny yellowish or brown parasite living on the underside of cannabis leaves. It feeds on the plant's sap, depleting its supply of chlorophyll and nutrients. It is resistant to most insecticides and is especially active in dry and warm conditions. In the early stages of infection, the leaves are covered with light dots. As the infection progresses, a dense web appears on the plant, enveloping the entire mass of vegetation. If spider mites are detected, a comprehensive treatment of the entire plant is required. The procedure should be repeated every 3-4 days for 2-3 weeks.
Thrips
Tiny, light-colored insects that feed on the sap of the cannabis plant. The presence of thrips is indicated by the appearance of small bronze or silver-colored defects on the leaf plate, as well as green-black spots that are their metabolic byproducts. Removal of infected leaves should be followed by comprehensive treatment of plants and substrate.
Aphides
Small insects of a green, brown, or yellow color. They hide on the underside of leaves and the lower part of stems, causing yellowing and wilting of the leaves. It feeds on the plant's sap, leaving a trail of sticky liquid ("honeydew") on which the sooty mold thrives. Aphids are carriers of viruses and other health-threatening cannabis diseases. Ladybugs are helpful in controlling aphids outdoors. Always attract these plant-friendly insects!
Whiteflies
Tiny white insects that look like clothes moths. Adult specimens settle on the underside of leaves and lay their eggs, followed by the appearance of larvae in the overwatered soil. Whiteflies feed on the sap of the plant, causing yellowing of the leaves and stunting of overall development. If you suspect the presence of whiteflies, take the cannabis by the stem and shake it. A swarm of whiteflies will be a sign of an infestation. To control whiteflies, plant companion plants such as zinnia or sage and use insecticides and sticky fly traps.
Mealy bugs
White-colored insects that cover the plant with a white coating and feed on its sap. Their primary habitat is the internodes and the underside of leaves. Large specimens are removed manually, followed by a complex treatment of the plants every 3-4 days until all traces of mealy bugs disappear.
Caterpillars
The larvae of butterflies that eat leaves. Caterpillar control includes the manual removal of insects and the installation of protective netting or covering materials.
Snails and slugs
Endanger plants that are grown outdoors. They prefer to settle under wet mulch, wood, or leaves and feed on the vegetative tissues of the plant, leaving a distinctive silvery trail. Place beer traps in their path, sprinkle diatomaceous earth on the ground, and place copper wire at the bottom of the plant.
Leaf miners
A fly larva feeding on leaf tissue, leaving a distinctive chaotic trail on the surface. Manual removal of infested leaves and the application of prophylactic agents to protect young leaves are used to control leaf miners.
Fungus gnats
Insects up to 2 mm in size breed in the soil and feed on the roots, reducing the overall immunity of the cannabis plant and causing wilting. Introduce beneficial nematodes into the soil, reduce watering intensity, powder the soil with diatomaceous earth, and place sticky traps around the plants.
Root aphids
A 1-2 mm insect that attacks the roots of plants by infiltrating their tissues and feeding on the plant's sap, causing wilting and stunted growth. To control root aphids, introduce beneficial nematodes into the soil, avoid overwatering the substrate, and use preventive treatment when watering.
Cannabis Diseases

Cannabis is more susceptible to disease due to the systematic violation of care conditions, creating a favorable environment for the development of pathogens. Many diseases are insect-borne. They are transmitted when plants are planted in poor quality local or purchased soil without prior treatment. For this reason, the routine inspection of plants for insects or diseases becomes particularly important in cannabis cultivation so that they can be identified in a timely manner and appropriate control and protection measures can be taken.
Combating Methods
Send infected plants to quarantine immediately upon their detection. Carry out a preventive treatment of healthy plants with organic fungicides. Take comprehensive measures to eliminate the disease as soon as it is identified.
Organic fungicides are natural medicines used to control fungal and bacterial diseases of cannabis in the vegetative stage. Compared to their synthetic alternatives, they are less toxic and safer for the environment and human health. Here are some of the most common ones:
Bordeaux mixture
It is used to control a wide range of fungal diseases and bacterial infections. The solution is prepared by mixing 10 grams of copper sulfate and 10 grams of lime per 1 liter of water.
Extracts and essential oils of plants
Garlic, pepper, cloves, lemon balm, and thyme all have antimicrobial properties and are used as organic fungicides in the form of solutions or tinctures.
Baking soda
The most accessible and affordable remedy for the early stages of fungal diseases. To prepare the solution, mix 1 teaspoon of baking soda with 1 liter of water.
Beneficial bacteria
Bacteria such as Trichoderma viride, Trichoderma harzianum, Paenibacillus polymyxa, Lacto Bacillus can be used to control fungal and bacterial diseases by creating a competitive environment. They are available in powder form.
Nematodes
Some species of nematodes are parasites of fungi. They can be used to control both terrestrial and soil-borne fungal diseases.
Common Diseases
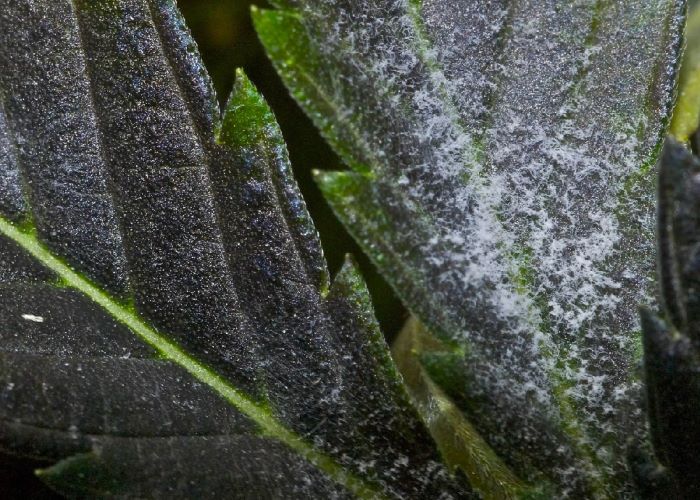
Powdery mildew
A fungal disease characterized by the appearance of a white coating on leaves that interferes with the process of photosynthesis. The leaves deform and fall off, thus weakening the plant. To control powdery mildew, remove infected leaves, treat the plant with a sulfur- or copper-based organic fungicide, and ensure proper air exchange in your grow room.
Gray mold
Also known as bud rot. Gray mold infects the flowers from the inside, but first colonizes the stems and branches, causing the appearance of softened or ulcerous spots. As the disease progresses, a gray or white fluffy web covers the buds. If gray mold is detected, remove infected parts of the plant and spray cannabis with a solution of neem oil or organic fungicides based on sulfur or copper, avoiding contact with healthy flowers. Pruned branches, leaves, and, sadly, flowers should be removed and discarded.
Consumption of buds infected with fungus is extremely dangerous to human health and can cause brain swelling and paralysis!
When growing cannabis indoors, preventive measures include maintaining a warm, dry microclimate, providing adequate ventilation in the grow room and plant area, using LST techniques, and timely defoliation. If the disease progresses despite the measures taken, get rid of the infected plant.
Septoria leaf spot
In the early stages of development, this fungal pathogen infects the lower leaves of cannabis, covering their surface with yellow or rusty spots and causing them to fall off. Often affects plants with a nitrogen deficiency. To control Septoria spot, remove infected leaves and spray plants with neem oil or a solution of baking soda to prevent the spread of spores. If you grow cannabis outdoors, treat the soil with compost tea and choose a different location for the next planting season.
Verticillium wilt
A fungal disease impacting the roots and above-ground parts of the cannabis plant. It develops in wet, nutrient-saturated soils with inadequate drainage. Plants infected with Verticillium wilt have yellowed and distorted leaves, browning of the stem base, and wilting of the top part and branches. If a diseased plant is identified, it should be removed from the plantation. The soil and the healthy plants should be treated with an organic fungicide.
Algae
Develop in hydroponic and aeroponic systems due to negligent operation and exposure to light. In addition to their distinctive green color, algae also come in shades of red and blue. In the early stages of development, algae create a competitive environment for cannabis roots in terms of nutrient uptake and can also be a cause of clogging in equipment. If the problem is ignored, algae will colonize the roots, enveloping them and depriving them of their ability to absorb beneficial substances, resulting in the death of the plant. If you have detected algae, perform a cleanup of the system. Preventive measures include keeping the tanks clean, regularly changing the nutrient solution, and making sure the cannabis roots are not exposed to light.
Fusarium wilt
A fungal pathogen affecting the leaves and roots of the cannabis plant. The leaves turn yellow and the tips curl upward, forming claws, while the roots begin to rot, spreading the disease up the trunk. There are no effective methods of controlling Fusarium wilt, so if it is detected, remove the diseased plants and treat the neighboring plants and soil with an aqueous solution of hydrogen peroxide at a 1:20 ratio. To prevent the occurrence of Fusarium wilt, use a high-quality potting soil, maintain a beneficial microflora in the substrate, and control the relative humidity in your grow room.
Root rot
A fungal disease that is characterized by the appearance of reddish-brown slime on the roots of cannabis plants. It mainly impacts seedlings and weakened plants. The disease can be detected by daily inspection of hydroponic or aeroponic systems. However, it is more difficult to detect in soil cultivation. The primary signs of root rot are wilting of the plant, yellowing of the leaves with the appearance of dry spots, and an unpleasant odor from the substrate. Gently dig up the soil and look at the roots. They should be firm and white. Otherwise, remove the root ball from the substrate, treat it with a baking soda solution, and change the substrate. Do not water the plants until the top layer of soil is completely dry. Do not overfeed, and keep your plantation clean and tidy at all times. Remember that the risk of root rot returning and spreading to healthy plants is very high. Therefore, in the event of a reoccurrence, dispose of the diseased plants and focus on preventing the problem.
Viruses
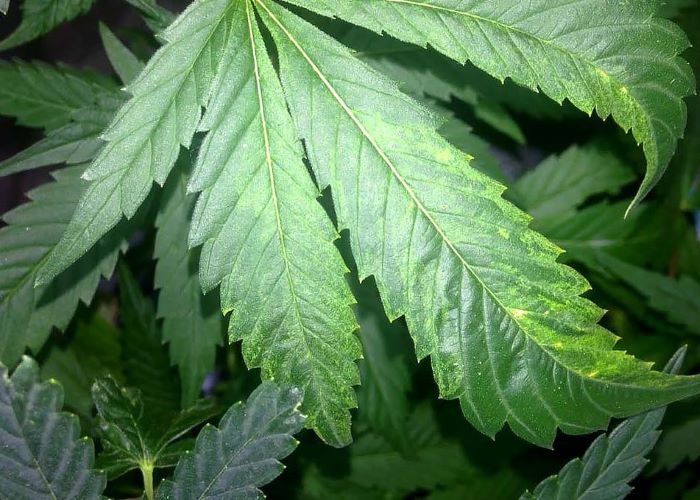
Most viral diseases of cannabis appear as mosaic pigmentation on the leaves and are not treatable. Primary preventive measures include keeping equipment clean and your grow room adequately ventilated, regularly monitoring plants, controlling insects that can carry viruses, and removing diseased plants.
Integrated Pest Management (IPM)
As mentioned above, the main cause of cannabis infections is weakened immunity due to poor hygiene, improper care, an unstable climate, or the genetic predisposition of the strain. However, even healthy plants grown under optimal conditions and with the proper care and attention can sometimes be subject to attack by pests and pathogens. The systematic use of pesticides and fungicides is not a solution in this case, as this approach not only affects the quality of the final product, but also poses a threat to consumers' health. Integrated Pest Management (IPM) was developed to streamline and optimize the process of controlling pests and diseases. This approach combines techniques aimed at controlling and managing insects and diseases in a sustainable, long-term perspective. IPM-based programs are primarily used in industrial-scale production and vary depending on growing conditions. They are grounded on four methods that can be easily integrated into the context of home-grown cannabis:
Cultural control
It provides a self-sustaining ecosystem that creates an environment hostile to pests and diseases. To do so, keep your work area and tools clean, introduce beneficial microorganisms into the soil, provide care and attention to plants, manage growing conditions, observe carefully, and record your findings for analysis so you can effectively adapt your experience in the future.
Physical control
It implies any physical action aimed at controlling pests. These measures include the use of sticky tapes, traps, barriers, and light-reflecting elements, timely defoliation and pruning, ventilation, UV exposure, microclimate management, and manual removal of harmful insects.
Biological control
Growing cannabis outdoors opens up the world of controlling natural processes for the benefit of your plants. Attract birds and cannabis-friendly insect predators to your grow spot. Include companion plants to deter pests and reduce their populations.
Chemical control
The last step involves the use of pesticides that are non-toxic to humans. It is applied in neglected cases when all other methods have failed.
Flushing
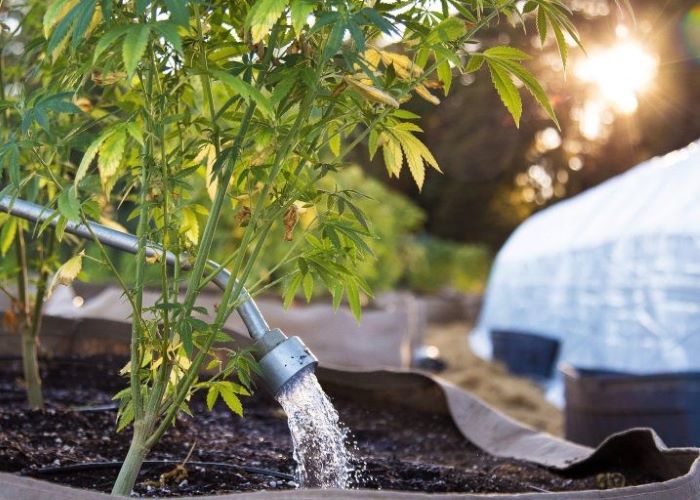
Flushing is a heavy irrigation of the cannabis root system with clean, pH-stabilized water that flushes out accumulated salts and minerals. This process is of particular importance to growers using mineral fertilizers and boosters for the elimination of chemical residues in cannabis. Flushing can also be beneficial in cases of nutrient overdose or blockage, as well as when there is a change in fertilizer composition as the plant transitions to the flowering stage.
It is worth noting that there is no need for flushing if you are growing organically. Organic fertilizers do not accumulate in the soil or cannabis tissues, and elimination of the complex soil ecosystem has negative consequences for plants.
It is important to determine the right time for flushing. Flushing cannabis too early or too late will result in a deterioration of the flavor and aroma of buds. When growing in soil, in case of using boosters, flushing is carried out 7-14 days before the expected harvest date. For inert media (coco coir, hydroponic systems), this interval is reduced to 5-7 days. Experienced growers are also guided by the trichomes' color change; they begin to turn cloudy (milky) about 2 weeks before the cannabis plant is ready to be harvested.
You will also need a TDS-meter to monitor the ppm level of the drainage water. For flushing, use clean, room-temperature, pH-stabilized (6.0-6.5) water with ppm levels no higher than 50. For the inert substrate, the pH of the flushing water should be between 5.5 and 6.0.
Flush the root ball with plenty of prepared water. Repeat the procedure at 5-10-minute intervals until the ppm level of the runoff is equal to the ppm level of the water used for flushing. Give the plants 3-4 days to rest, then proceed with normal watering with clean, pH-stabilized water as needed until the harvest date.
Flushing cannabis grown hydroponically is easier and faster compared to plants cultivated in soil. All you need to do is change the nutrient solution in the tank 3-4 days before the harvest with clean water with a pH not higher than 5.5-6.0 and ppm not higher than 50.
A partial change in leaf color to yellow or red (depending on strain) after flushing is considered normal. However, if there is mass yellowing and the flowers begin to wilt or change color, harvest earlier to preserve the potential of the buds at that point.
Drying
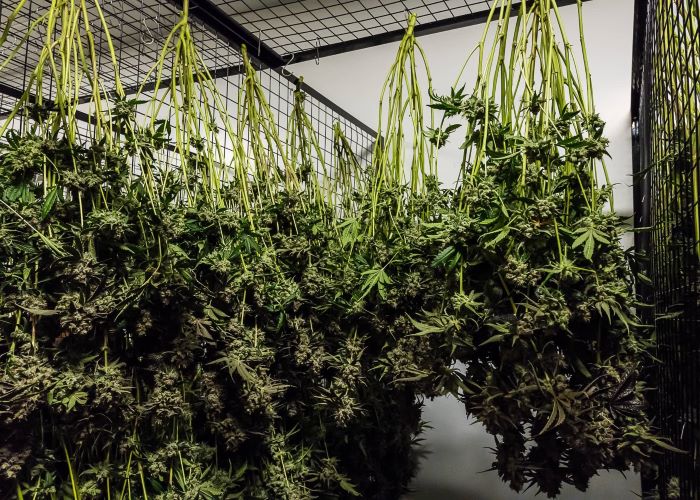
Several factors should be considered to ensure an optimal drying process. The temperature in the room where the cannabis is dried should be between 18-22 °C and the relative humidity should not exceed 45%. Slight fluctuations in these values over short periods of time will not cause any harm, but continuous variations are not acceptable. Avoid exposing the flowers to direct sunlight, since UV rays degrade THC. When drying the whole plant or branches, hang them 20-30 cm apart to allow air circulation between them. The cut flowers should be spread out evenly on drying nets or a horizontal surface covered with thin paper, with occasional turning of the buds. If you have grown various strains, label each branch with the name of the strain to avoid mixing them up.
The average time it takes to complete the drying process is 1-3 weeks. To know when it's time to cure buds, bend the branch at its base. If it does not bend but breaks with a crackling sound, the flowers are dried.
Curing
Properly carried out curing significantly improves organoleptic properties (flavor, aroma), the intensity of the effect, and the shelf life of the final product. During this process, the residual moisture from the deep layers of the flowers is distributed, while excess moisture evaporates from the surface. The breakdown of glucose and chlorophyll, which gives the weed its distinctive fusty hay flavor, is complete, and partial tissue fermentation takes place to unlock the composition of terpenes and cannabinoids in the resin.
Curing is easy and simple to perform even for a beginner, as it does not require any specific knowledge or skills.
- Prepare airtight glass containers with screw caps (Ball Mason Jars) up to 1 liter in volume.
- Separate the flowers from the stems and place them in the jars without compacting them, filling them to about ⅔ of the total volume of the container. When growing several strains, use separate jars.
- Store jars filled with buds in a dark place at a temperature of 14-18 °C. Lower temperatures (like in the refrigerator) will slow down the curing process.
- As condensation builds up on the walls of the jars, open them periodically to "burp" for 5-15 minutes over 2-3 weeks until all excess moisture has evaporated.
- Inspect the contents of the jars regularly to prevent the formation and spread of mold, and if a problem is found, remove the source of the infection immediately.
To make sure the buds are properly cured, take one and squeeze it lightly with your fingers; it should be springy and firm, but not crunchy. When that moment comes, you have two choices: either proceed with the sensory analysis or send the buds to secondary curing, which can last from one week to six months. During this time, cannabis completely loses its green color and acquires a distinctive golden-brown, purple, or gray hue, achieving a truly delicious flavor. We understand that it will be incredibly hard to resist (after such a long wait!), but trust us, the reward will be worth the anticipation.
Storage
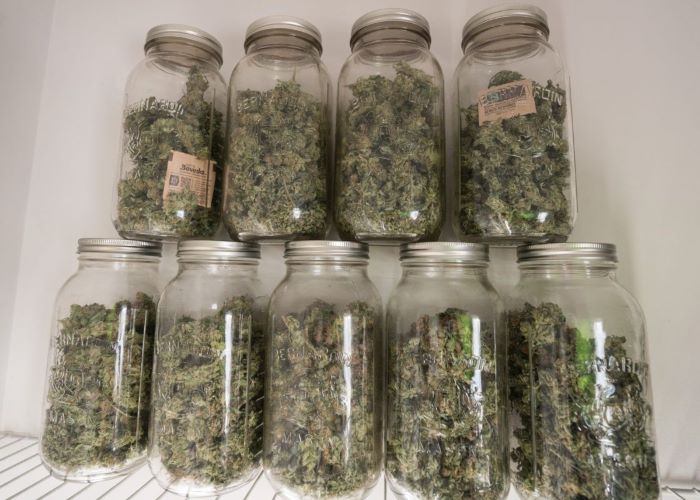
The dried and cured buds are stored in tightly closed jars, filled to ⅔ volume, in a dark place at a temperature of up to 23 °C (73 °F). Each jar should be labeled with the strain name and the start/end dates of curing.
The optimum humidity for cannabis to maintain its properties is 59-62%. For large amounts, the use of a hygrometer and special humidity control units is recommended.
Moreover, it is advisable to minimize the frequent contact of the buds with oxygen. This can be achieved by using several small jars instead of a large one, or by placing the flowers in separate zip-lock bags inside a jar.
Storage of Seeds
Your favorite store has launched a seasonal promotion, and now your place looks like a seed bank? Growers shared their success in the cultivation of regular strains? Your plans have changed dramatically, and a shipment from the seed shop is stuck on the shelf, waiting patiently for the zero hour? The time between the purchase of seeds and their germination can stretch indefinitely for a variety of reasons. To prevent seeds from losing their viability over time, it's important to store them properly. Given the right conditions, they can retain their ability to germinate for 5-10 years (!) without any noticeable loss in yield or quality.
First, make sure the package containing the seeds is airtight and sealed. Seeds from the seed shop are usually sold in the original packaging, which provides this parameter. The first thing to check when dealing with seeds is the integrity of their shell. Place seeds in a zip-lock or moisture-proof container and release excess air before storing. Keep the seeds in a dark place. The label for each strain should include the name and date of storage. This will help you track the length of the deadlines. It will also prevent confusion when germinating.
After cleaning the work surface with alcohol or antiseptic, perform manipulations with seeds in a dry and clean place, wearing gloves.
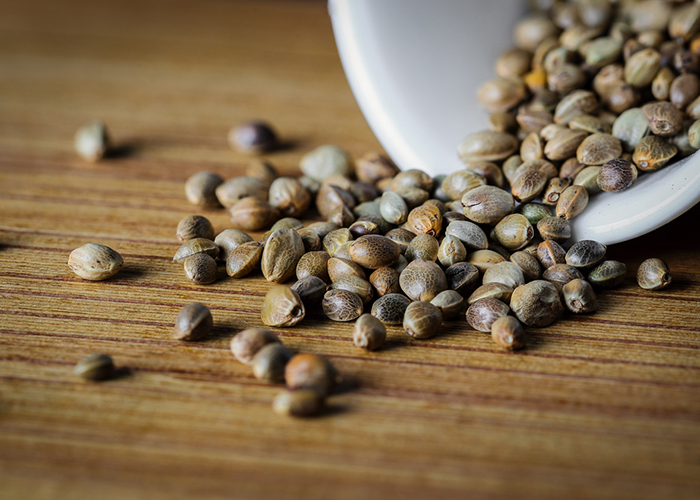
The place for storing seeds should be dry and cool, with a temperature between 6-8 °C and a relative humidity of 5-7%. The best option is the bottom shelf of the refrigerator. It's important to avoid sudden temperature changes that can lead to mold growth or unwanted germination. It is not advisable to freeze and thaw seeds. This will significantly affect the germination rate.
Keep in mind that there is no guarantee of 100% preservation, as each seed reacts differently to various external factors. These simple and effective recommendations will ensure that you maintain optimal storage conditions for seed stock and enjoy your favorite strains for years to come.